If this editor looks unfamiliar, you're likely using the previous version.
Access the right documentation by clicking on the button.
Effortlessly kickstart your journey with our beginner-friendly guides!
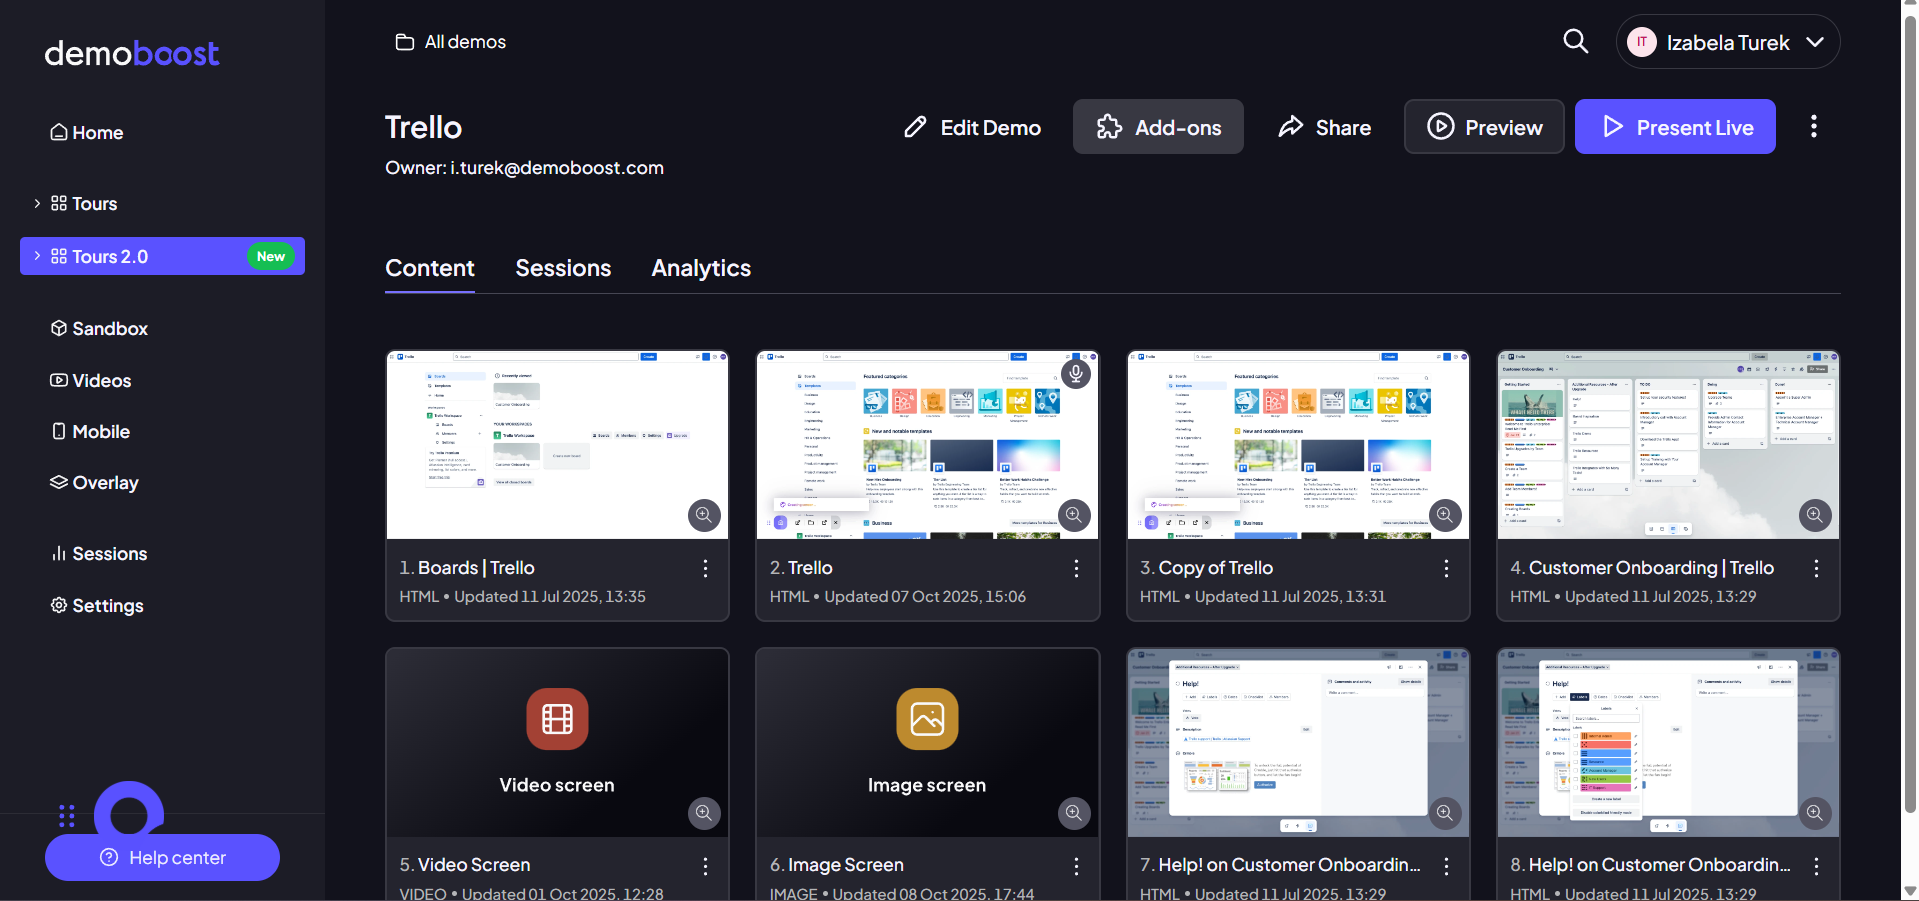
Let’s look at how you can add the Pick Your Own Journey screen to your demo in Tours 2.0. This screen allows prospects to view only the relevant content based on the qualification questions.
Step 1:
Click on the ‘Add-ons’ button.
Step 2:
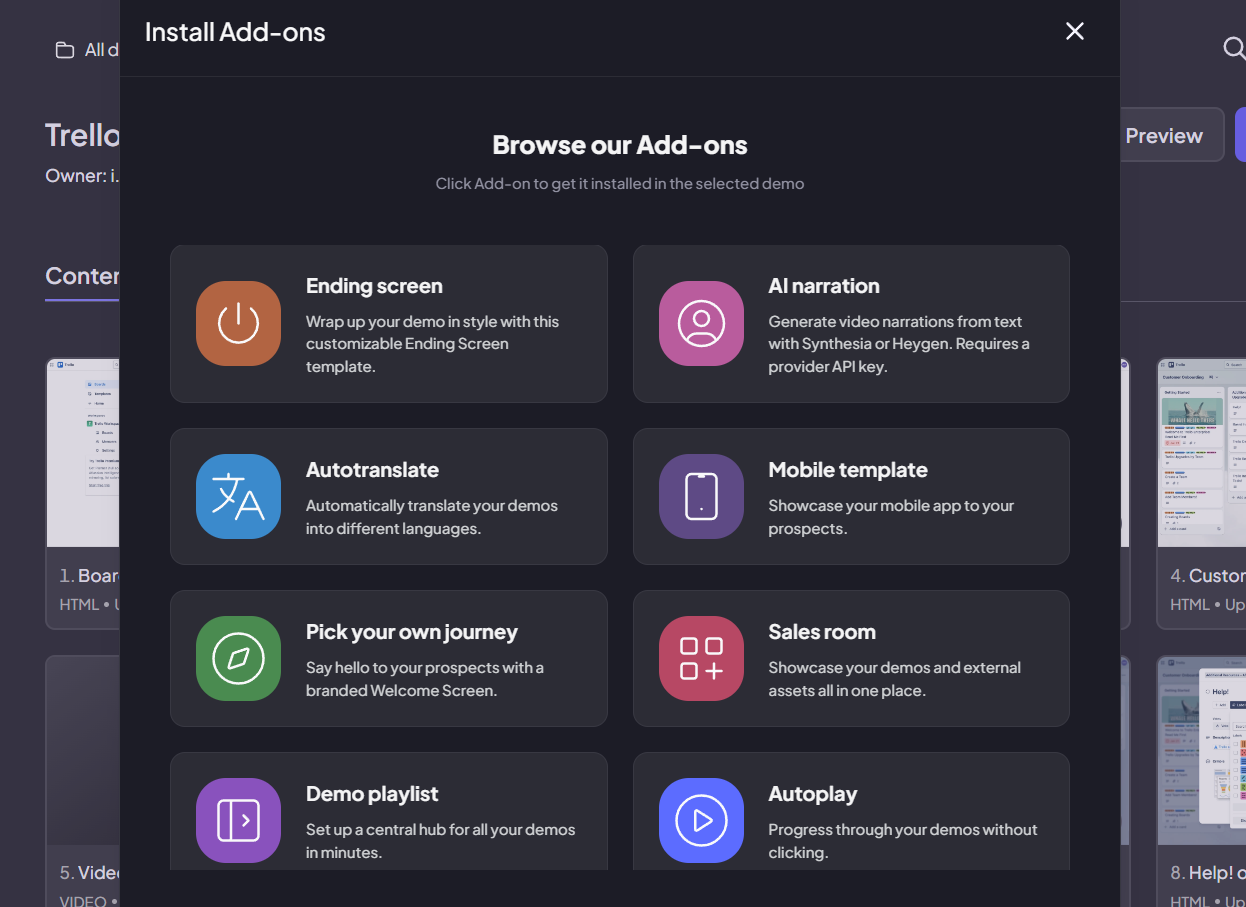
Install ‘Pick Your Own Journey’ add-on.
Step 3:
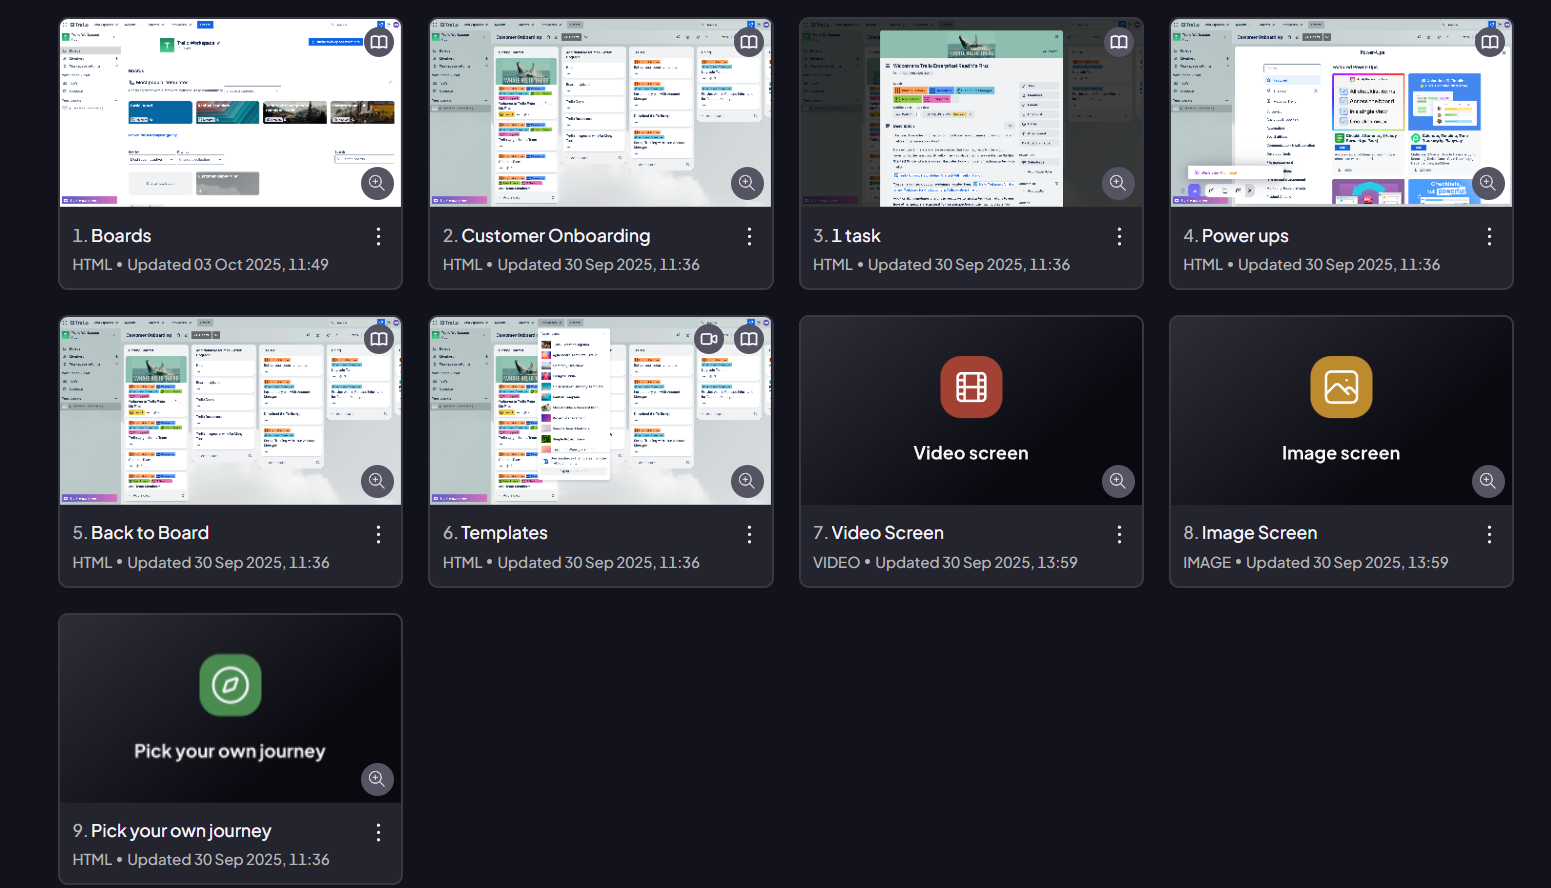
The screen will be installed.
Step 4:
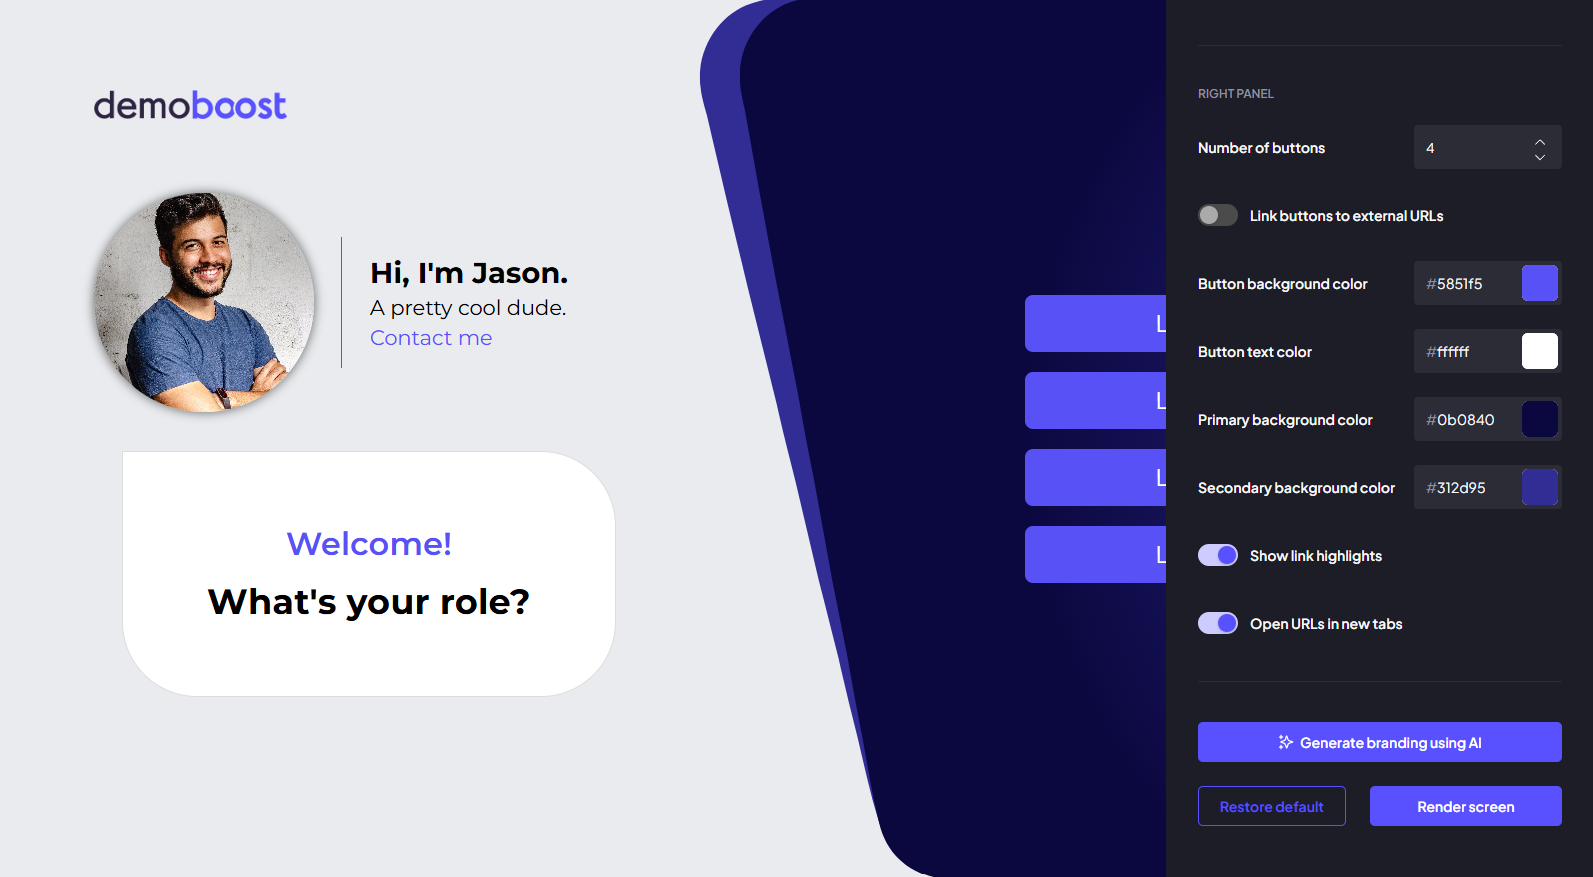
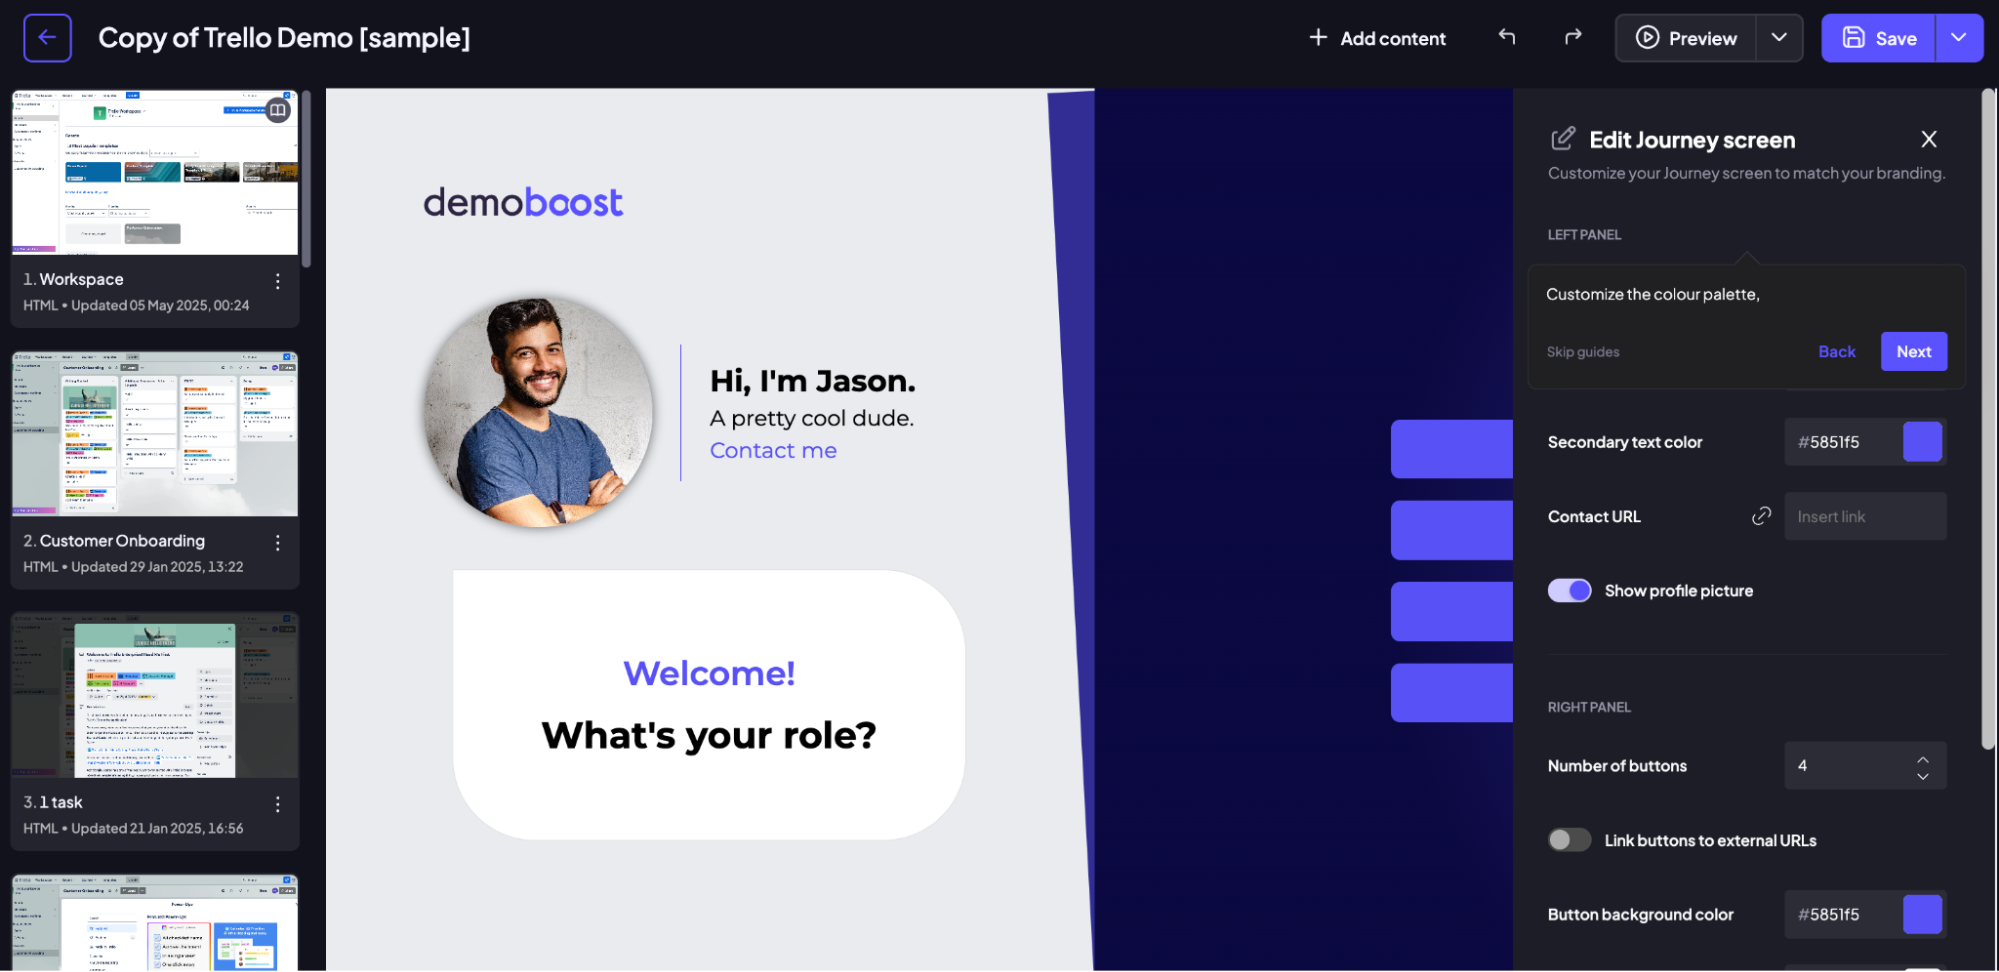
This is your customizable screen where you can make the edits. Change the logo, photo, intro text, or button as needed.
Use buttons to lead users to the topic that interests them the most- by linking the button to the screen of your choice, or adding an external URL.

Step 5:
To customize the visual presentation of your screen, click the Edit button (pencil icon) in the top-right corner. From the customization panel, you can adjust colors to match the product branding, manage the number of option buttons and add external links by enabling the “Link buttons to external URLs” toggle.
To generate branding automatically, upload a brand screenshot or paste a website link, then click “Generate branding using AI”, and Demoboost will instantly create a matching color palette for your template. All generated branding remains fully editable, giving you full control while helping you create polished, on-brand demos in seconds.
Step 6:
Click ‘Restore default’ to start from scratch.
Click ‘Render’ only if you want to lock the changes on the screen and make it uneditable.
And finally, close the popup and click to save the screen when you’re done.