If this editor looks unfamiliar, you're likely using the previous version.
Access the right documentation by clicking on the button.
A Sandbox Demo provides viewers with an interactive, self-guided experience, allowing them to freely navigate between different pages and features of your product. This guide walks you through the process of building a fully navigable sandbox - from capturing screens with Sandbox Capture Mode to completing it with Global Linking.
You can either capture a new demo in Sandbox Mode, where the screens you visit are automatically connected, or use Global Linking to quickly add navigation across an existing demo.
Step 1: Capture a New Sandbox Demo
Open the Demoboost Extension and either create a new demo or select an existing one you'd like to continue capturing.
Open the Capture menu, navigate to Multi Capture, and enable Sandbox mode for the Autolink button.
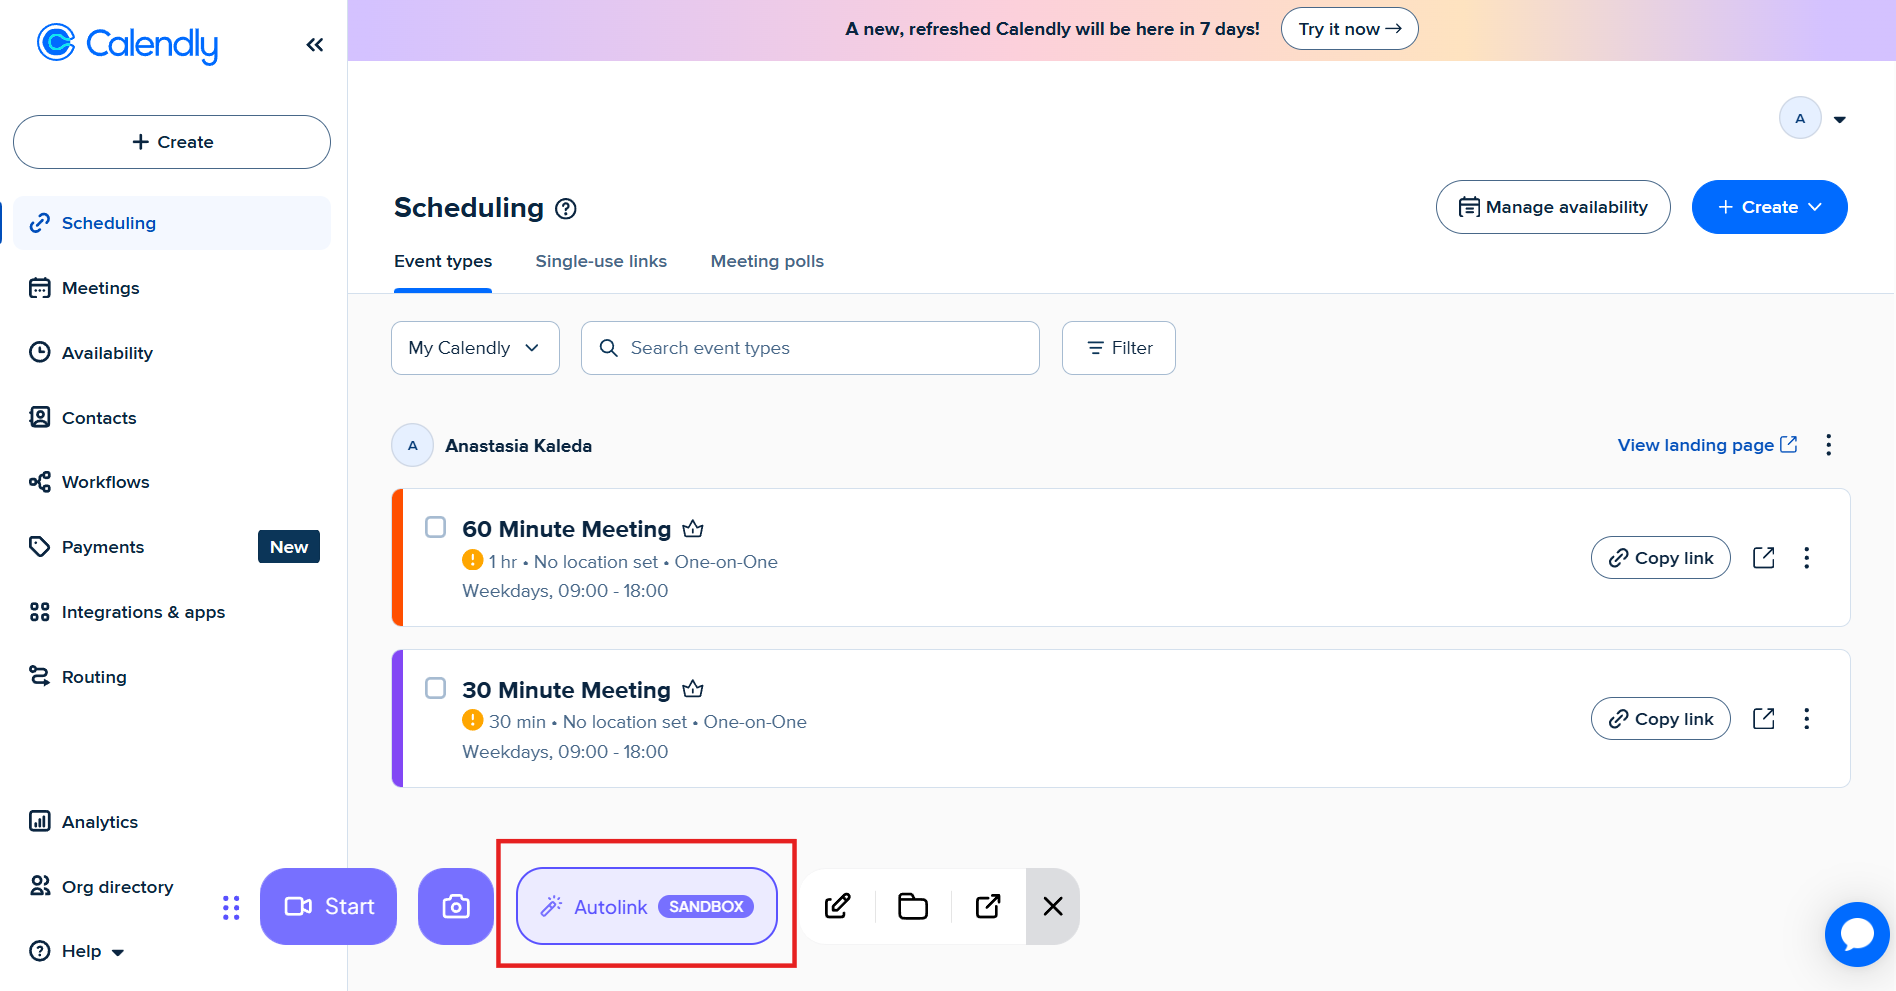
Capture all the screens you want to include in your demo. As you navigate through your application, Demoboost automatically creates links between the screens you visit, eliminating the need to manually connect them later.
Note: Wait for the ‘screen captured’ notification before navigating to the next screen to ensure each screen is captured successfully.
Step 2: Review the Automatically Created Links
Once you've finished capturing, open the Editor.
You'll notice that every interactive element you clicked during capture has already been linked automatically.
Note: Only the elements you actually clicked on during capture are linked automatically. If an element wasn't clicked, you'll need to either create a single manual link or use Global Linking to apply it across your demo.
Step 3: Add Navigation with Global Linking
Typically, the first captured screen won't have a navigation link because it was already open when the capture session began and therefore wasn't clicked.
Rather than adding the same link manually on every screen, use Global Linking to apply it everywhere the element appears.
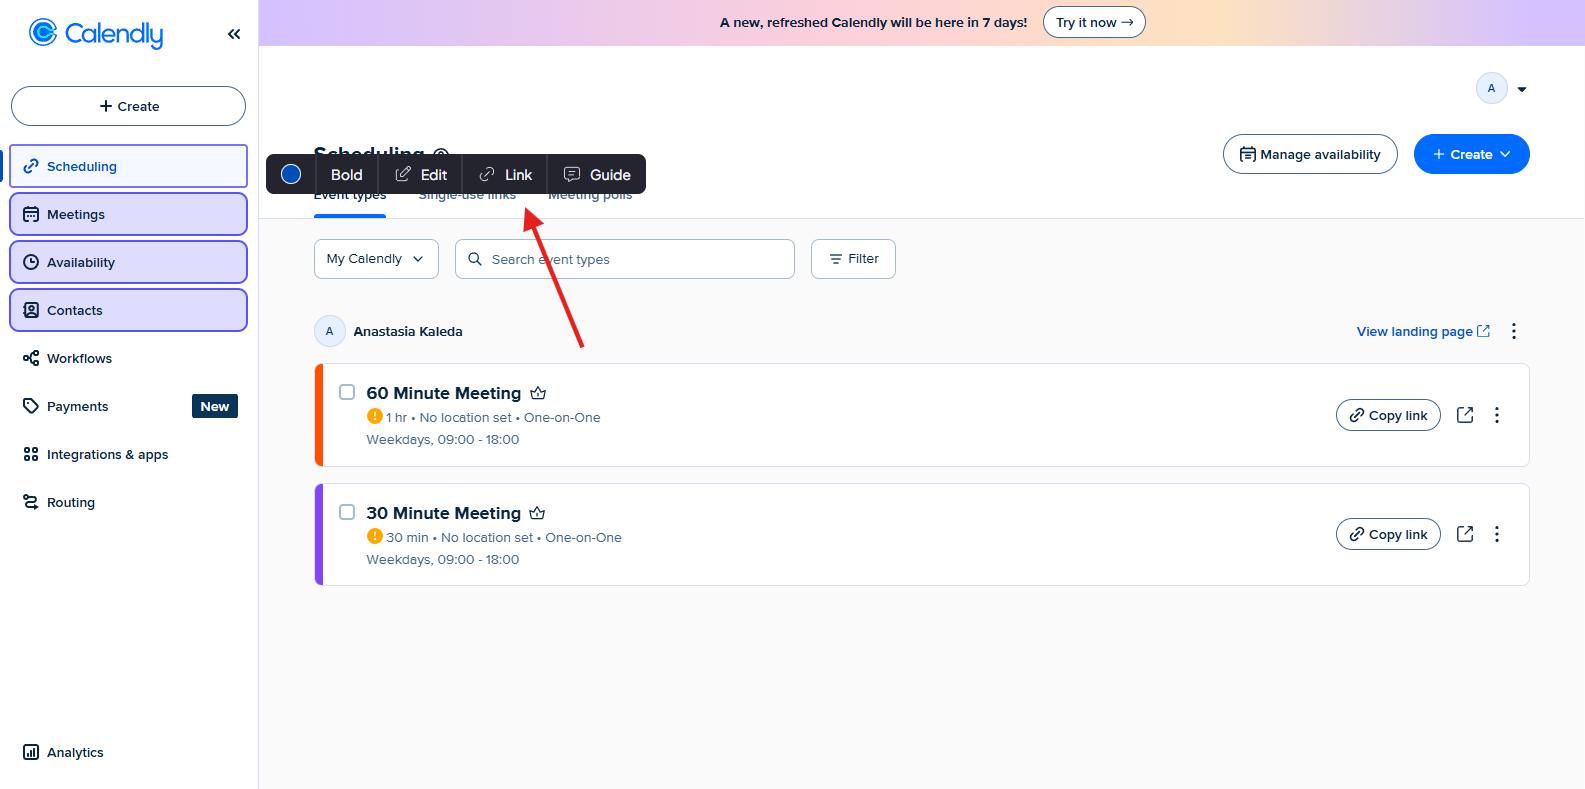
Select the element you want to link, then click Link from the element toolbar at the bottom of the editor.
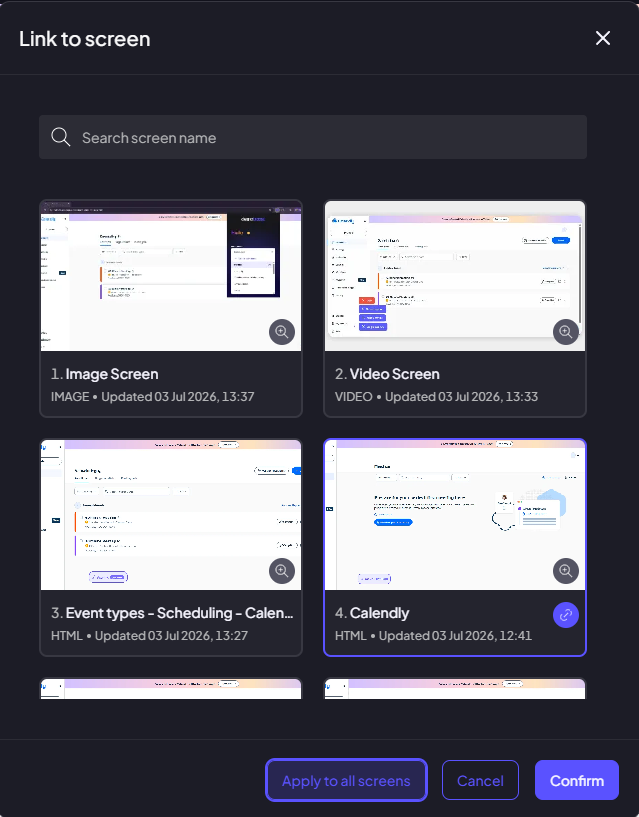
Step 4: Apply the Link to All Screens
Choose the destination screen, then click Apply to all screens.
Demoboost scans your demo and identifies every screen where the selected element appears, allowing you to apply the link across all matching screens in a single action.
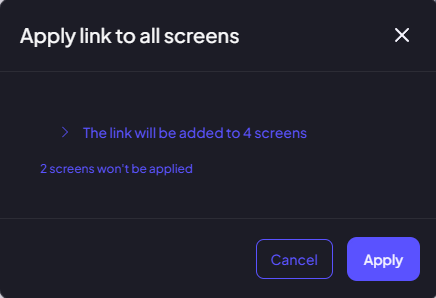
Step 5: Review and Confirm
Before applying the changes, you'll see a preview showing:
- Which screens will receive the new link.
- Which screens will be skipped.
Review the results, then click Apply to confirm.
Repeat this process for any other elements that weren't linked automatically during Sandbox Capture.
That's it! Your navigation has now been applied across every matching screen, giving you a fully navigable sandbox in just a few clicks while eliminating the need to create repetitive links manually.