If this editor looks unfamiliar, you're likely using the previous version.
Access the right documentation by clicking on the button.
Effortlessly kickstart your journey with our beginner-friendly guides!
In this tutorial you'll learn how to build and customize gallery screens and showcase all assets in one place.
Step 1:
As with all add-ons, you will find them in the "Add-ons" section. Choose the feature you want to install. Open the new screen after installation.

Step 2:
To add a row to the grid, select a desired layout. Once you add the layouts, you can change their positions by clicking the arrow button. You can also delete a row by clicking the Delete button

Step 3:
Click to add your own image and change the text using the Demoboost editor.
Upload a picture,or provide its URL. Click Save once you're done.
The text can be customized as well, by clicking on it.

Step 4:
To customize further, click on the Settings button. Here, you can link your tile to an external URL or change the tile type.

Step 5:
To add a video. Click to add a video file.You can either upload a video,or add a link to it.
Click Save once you're done.

Step 6:
As with all templates, you can change the logo, header text, subheader text and button text.
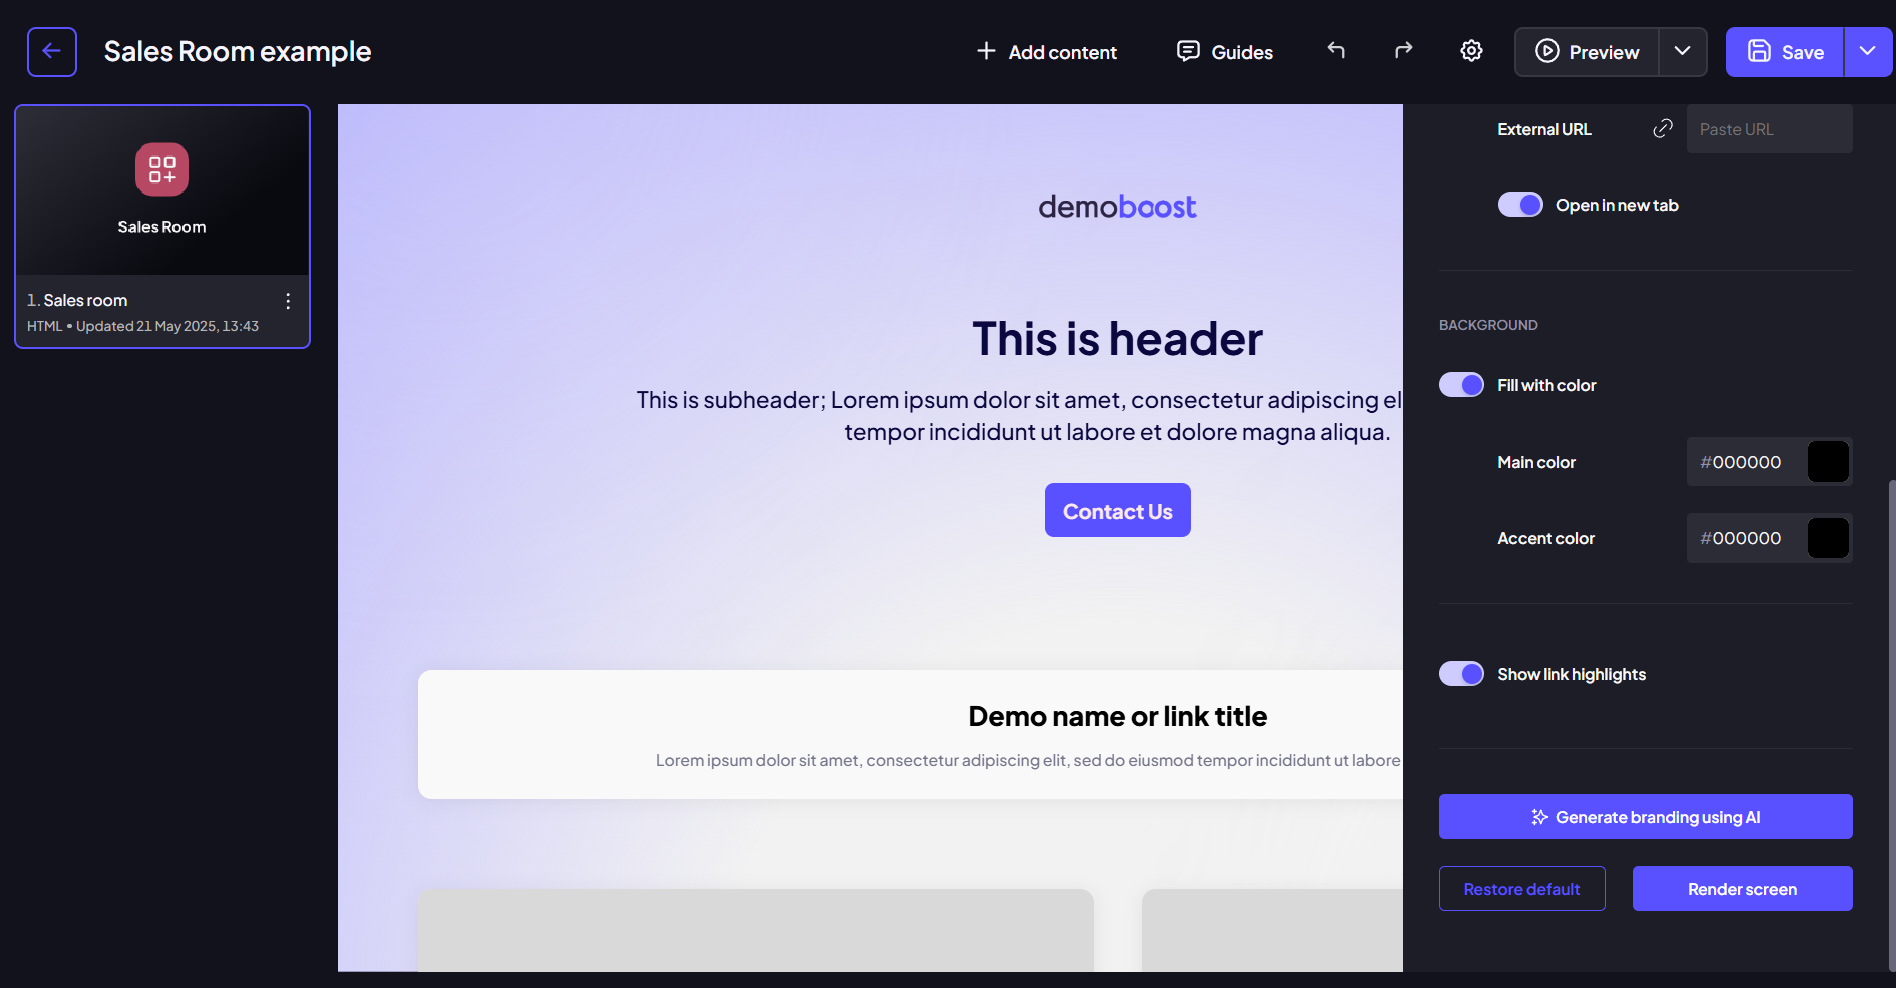
In the top-right corner, you can also find the template settings. Here, you can control the visibility of the header elements, change the button color, adjust the background color manually or generate branding automatically using AI by clicking “Generate branding using AI” and uploading a brand screenshot or pasting a website link.
You can also upload your own image by disabling the “Fill with color” option.

Step 7:
Lastly, you can turn off the default link highlights.
The buttons at the bottom allow you to reset the colour scheme to the default state as well as render the screen to lock your Sales Room in.