If this editor looks unfamiliar, you're likely using the previous version.
Access the right documentation by clicking on the button.
Step 1:
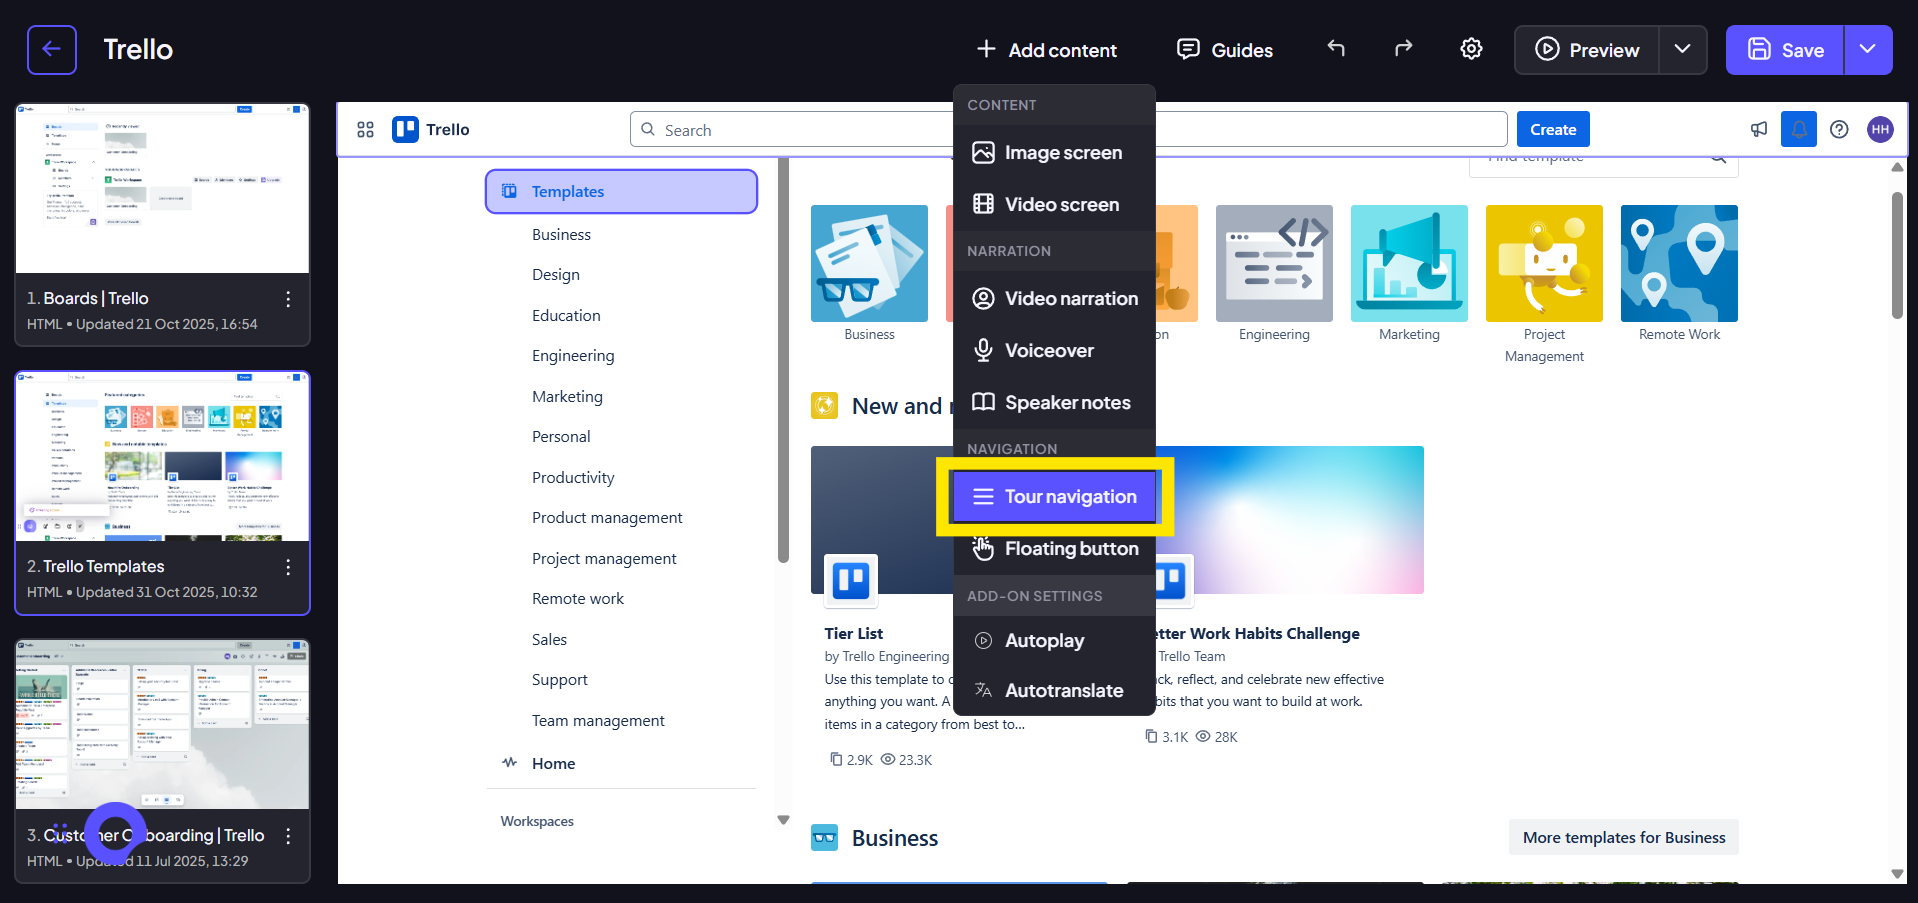
To begin, open the demo you wish to enhance. Navigate to the demo's details screen and click the "Edit demo" button to open the editor interface. Once inside, click the "Add content" button near the top of the screen, and from the dropdown menu, choose the "Tour Navigation" option. This launches a modal where you will define your menu's structure.
Step 2:
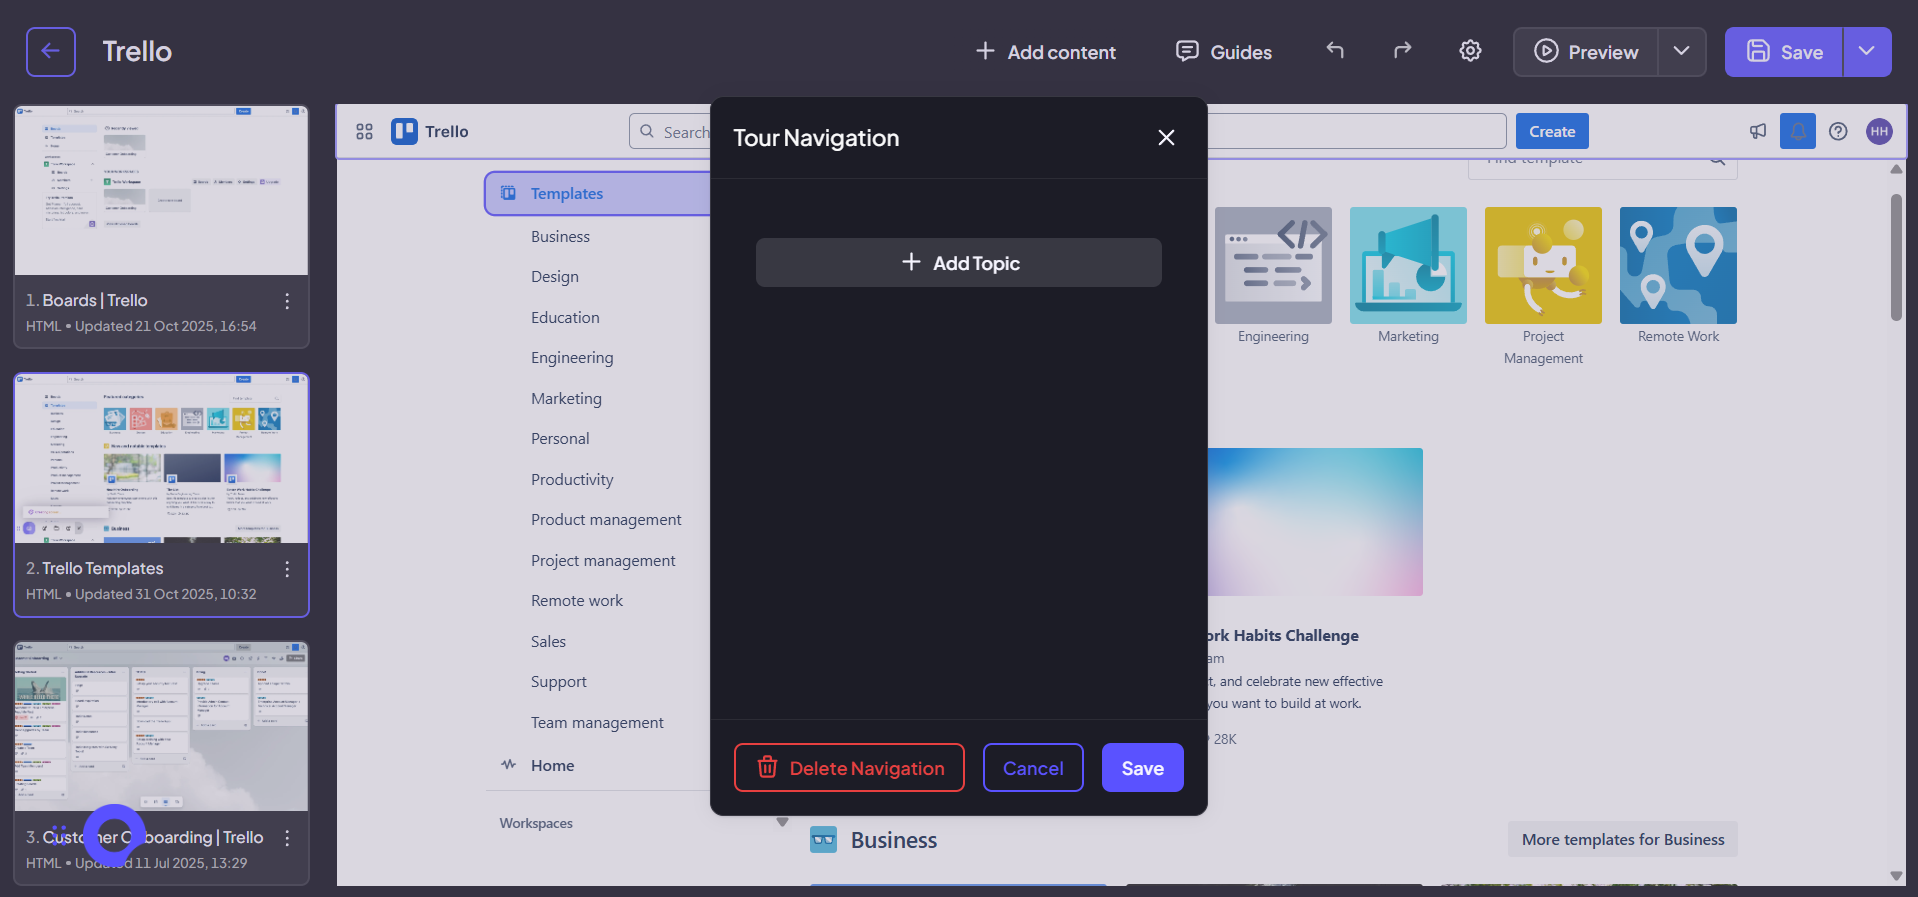
With the Tour Navigation modal displayed, click the central "Add Topic" button to begin defining your first menu item.
Step 3:
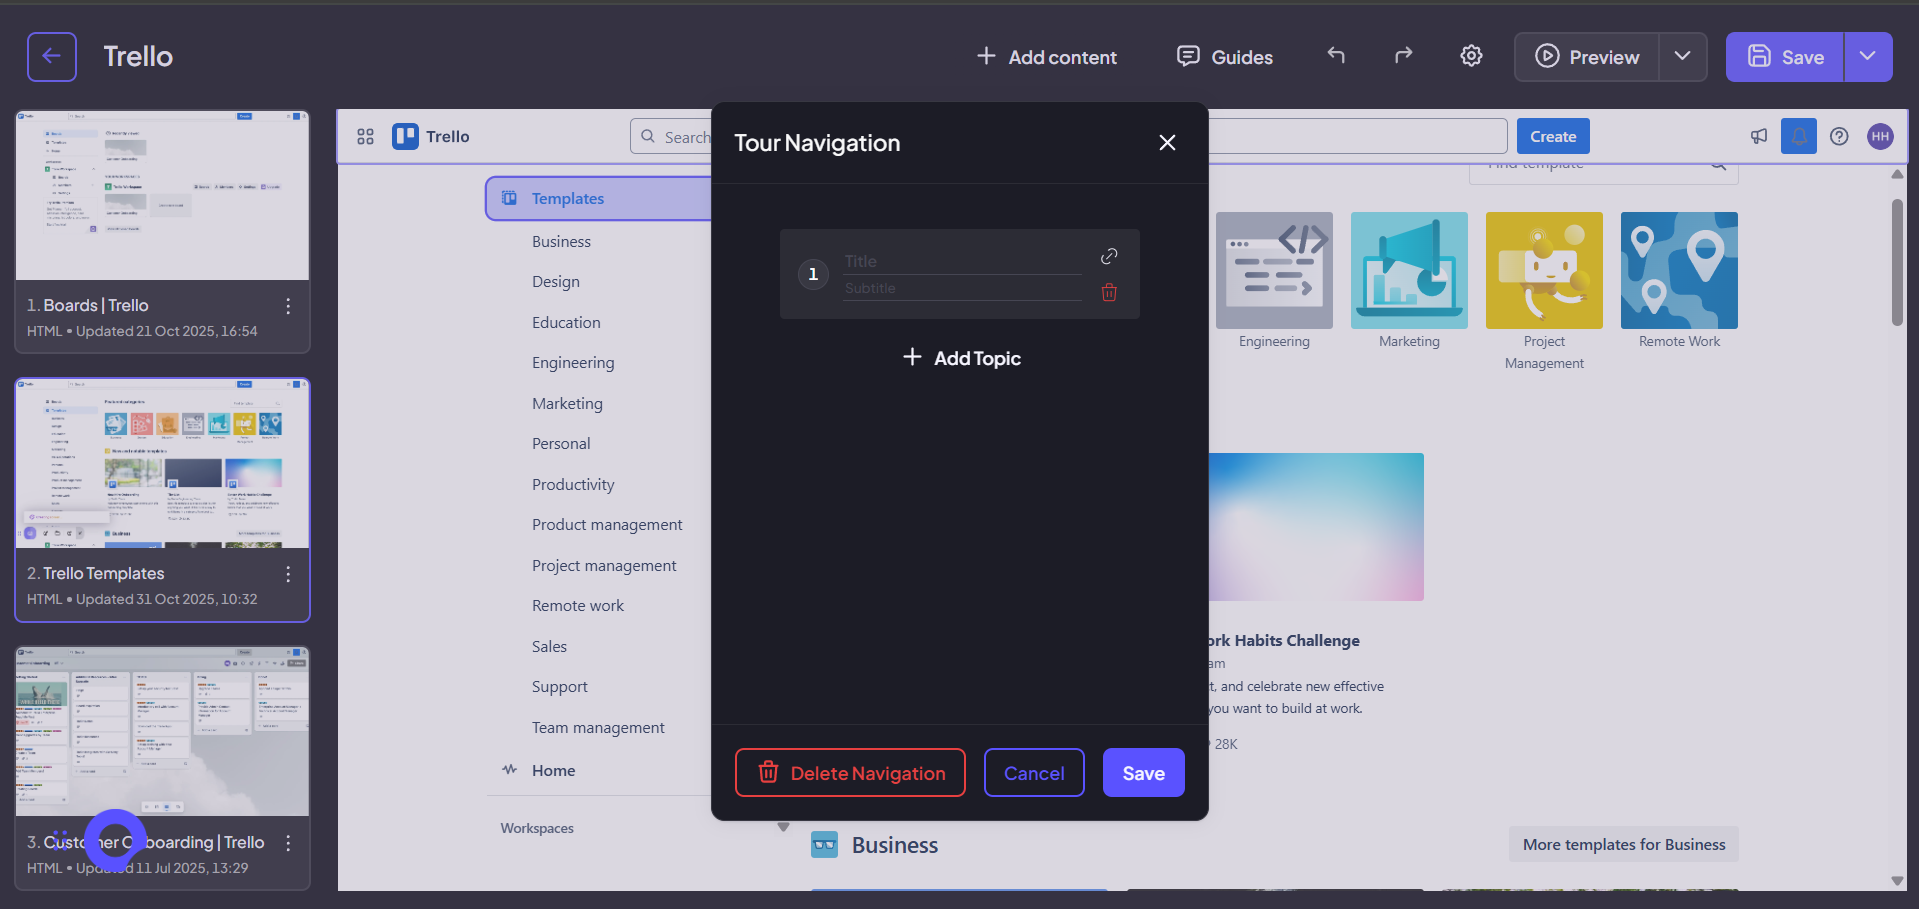
Enter a clear and concise title for the menu item, along with a helpful subtitle. This text will appear in the navigation menu and serve as the label your audience clicks.
Step 4:
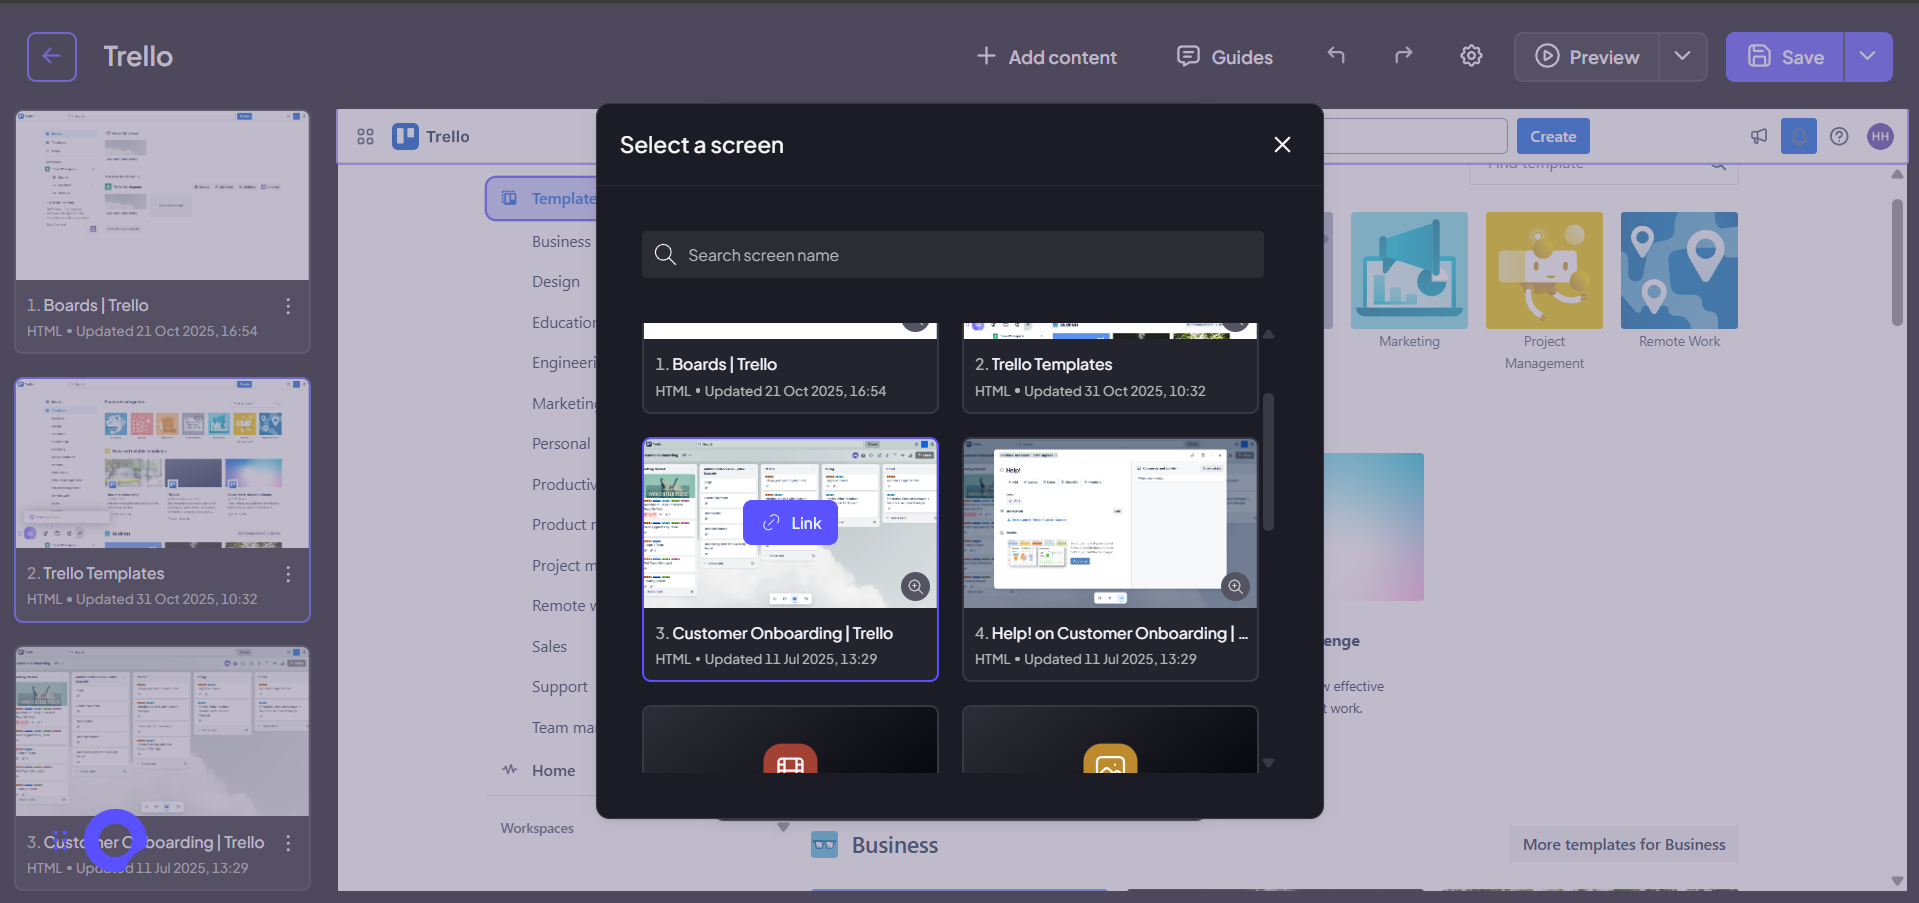
To set the destination, click the prompt to add a link to the screen for this topic. This opens the screen selection tool.

Step 5:
Select the specific screen in your demo where this topic begins. This ensures that when the audience clicks the link, they are instantly taken to the correct starting point.
Step 6:
To build a comprehensive menu, repeat the process of defining the title, subtitle, and destination screen link for every major section you want your audience to be able to navigate to.
Step 7:
Once you have added and linked all the necessary topics, click the "Save" button at the bottom of the modal to finalize and implement your new navigation menu.
Step 8:
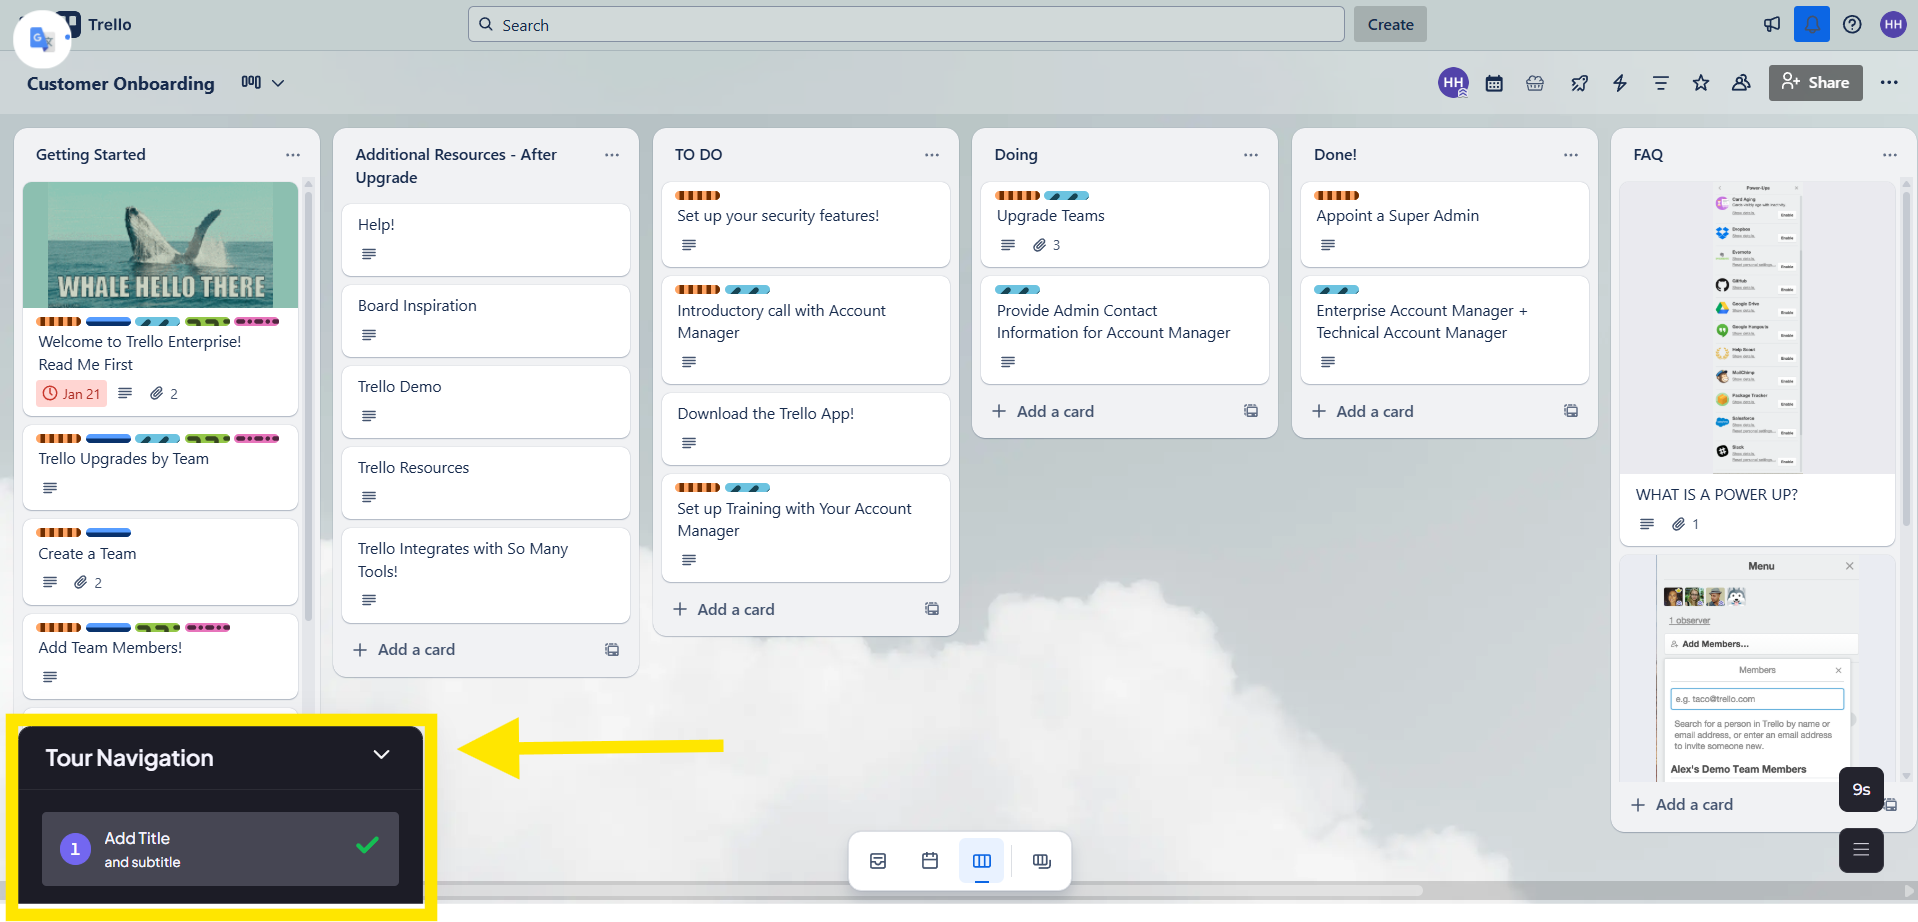
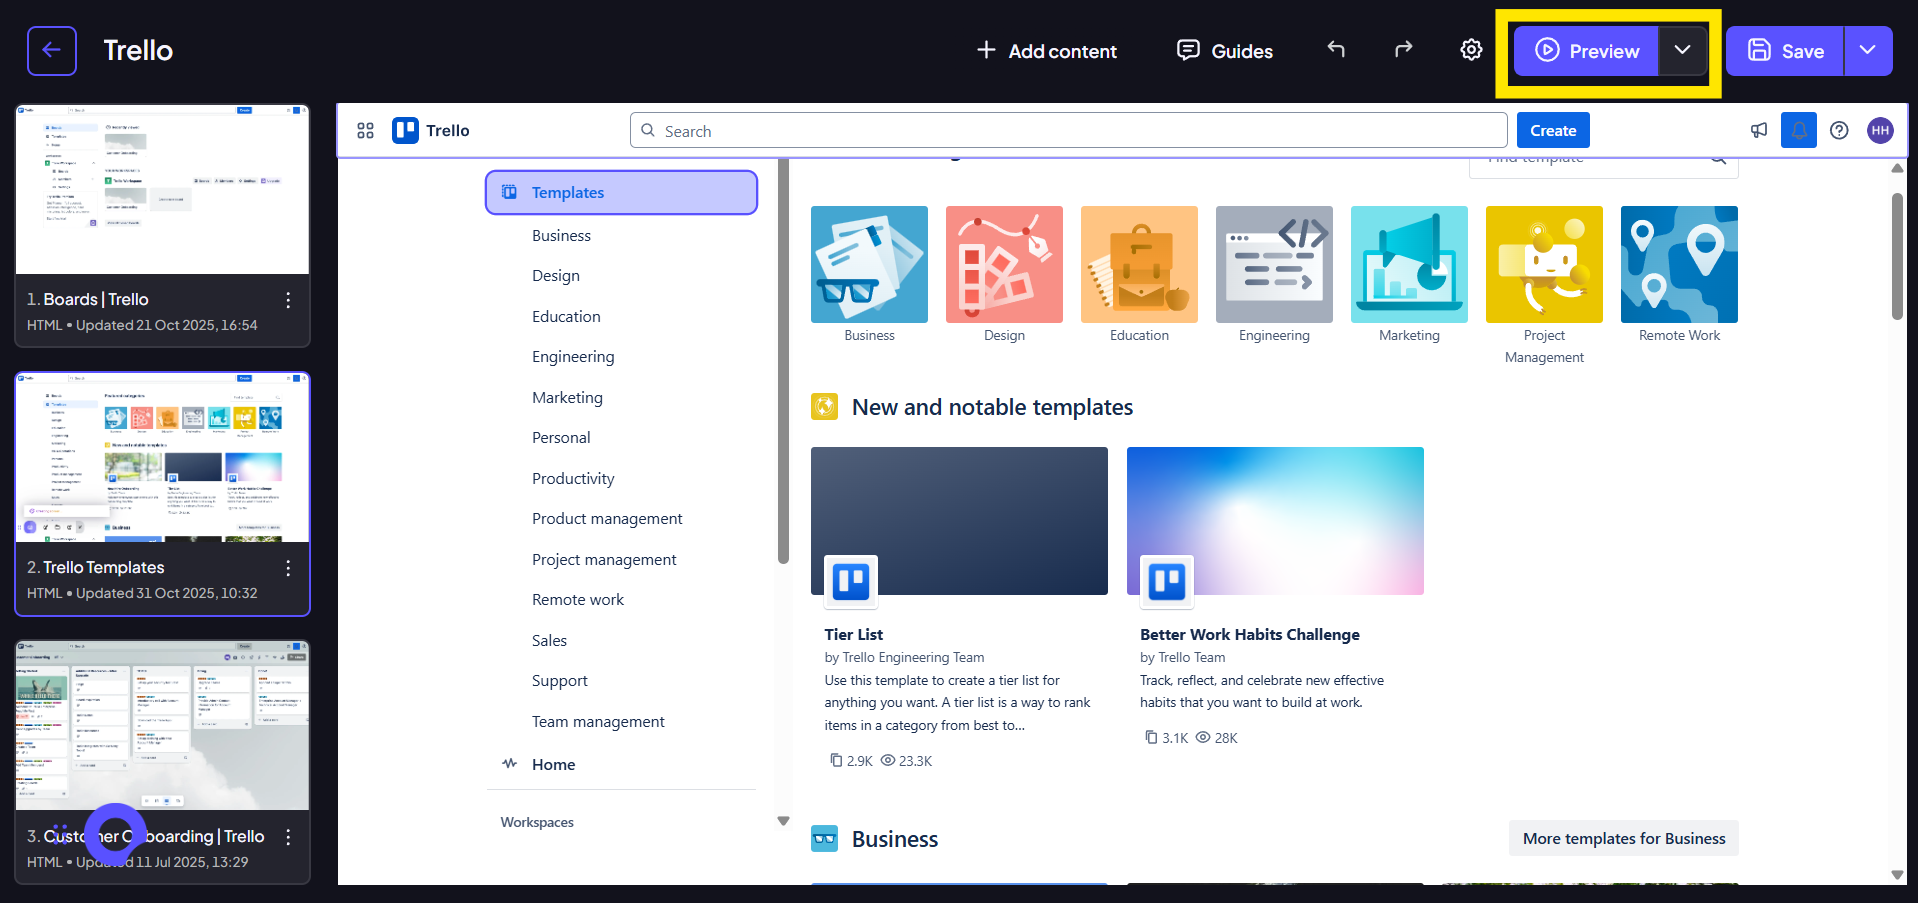
To confirm the feature works as intended for your audience, click the "Preview" button in the top menu bar to open the demo in a viewer window.
Step 9:
In the preview mode, locate and click the Tour Navigation element. A menu will display all the topics you defined, allowing you to confirm that all titles and linked destinations function correctly.