If this editor looks unfamiliar, you're likely using the previous version.
Access the right documentation by clicking on the button.
The Great Demo Template Add-On provides a guided framework for creating an impactful demo that follows the proven Great Demo methodology. This process ensures your presentation is focused, concise, and built to effectively showcase your solution to customers.
Step 1:
Before installing the template, ensure your visual assets are ready. You must capture the screens from your product that you plan to showcase. If you don't already have these screens in your library, use the platform's extension to capture the necessary steps.
Step 2:
The Great Demo Template requires a clean environment. To start, navigate to your demo library and click the "Create new" button. From the dropdown menu, select "Create new demo". A modal will appear. Give your new demo a clear, descriptive title and click Create to open it.
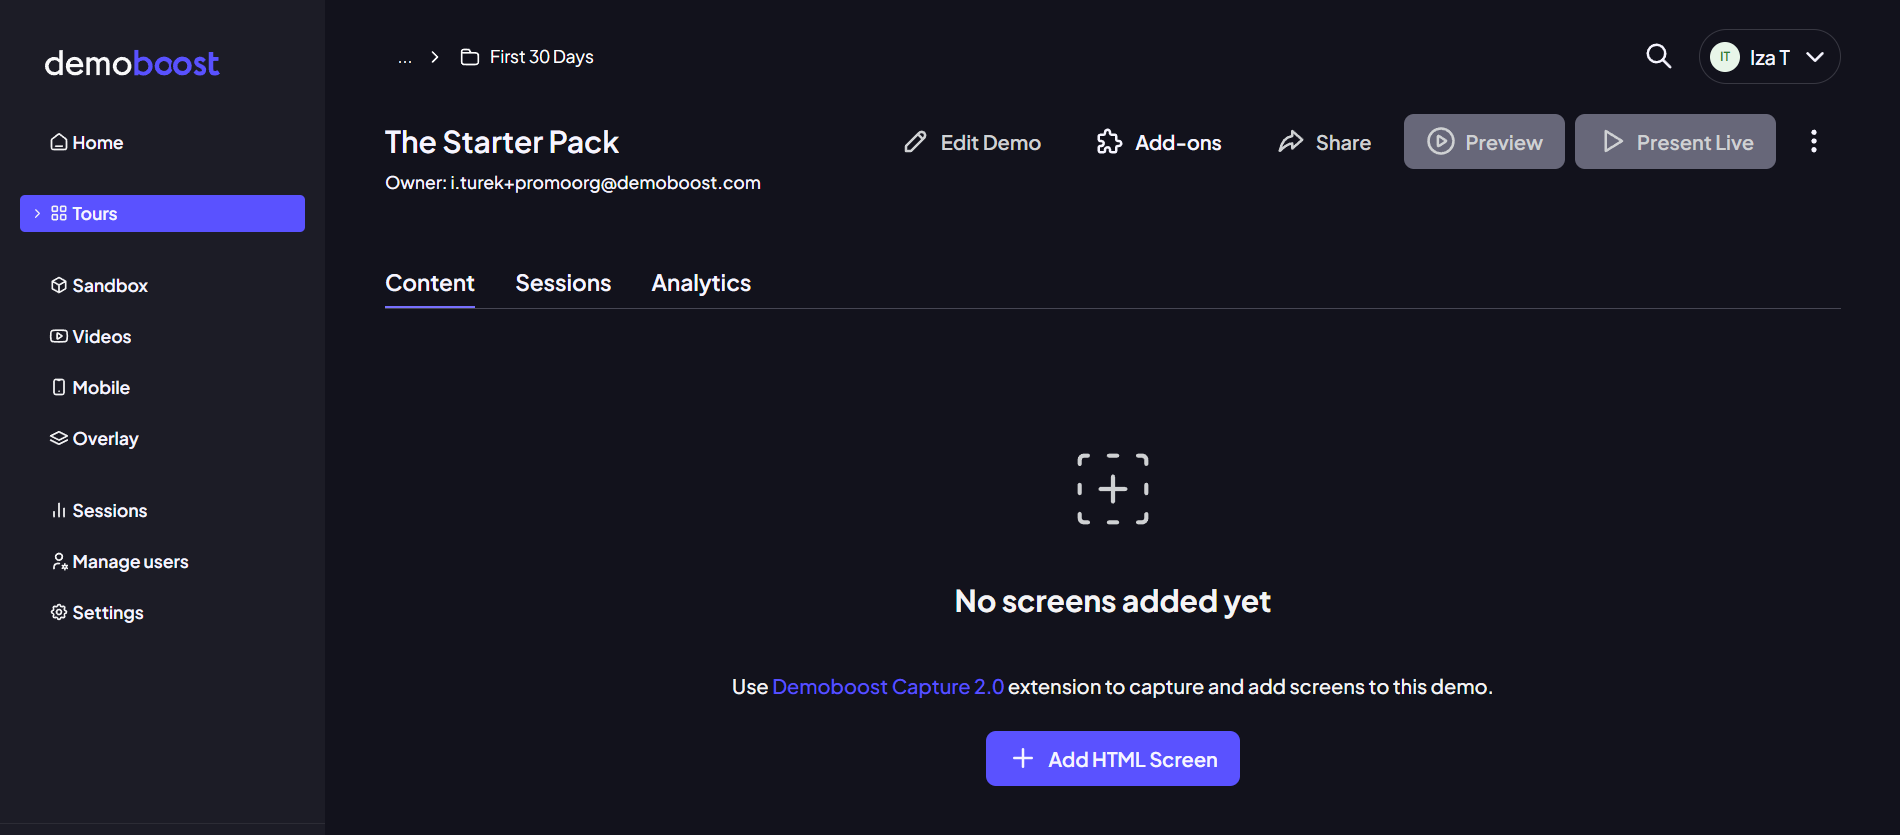
Step 3:
On the newly created demo's details screen, look for the list of options near the top menu. Click the "Add-ons" button to open the library of available tools.

Step 4:
Browse the available add-ons and choose the "Great Demo Template". Click to install it. The installation process will populate your demo with four structured, step-by-step screens.
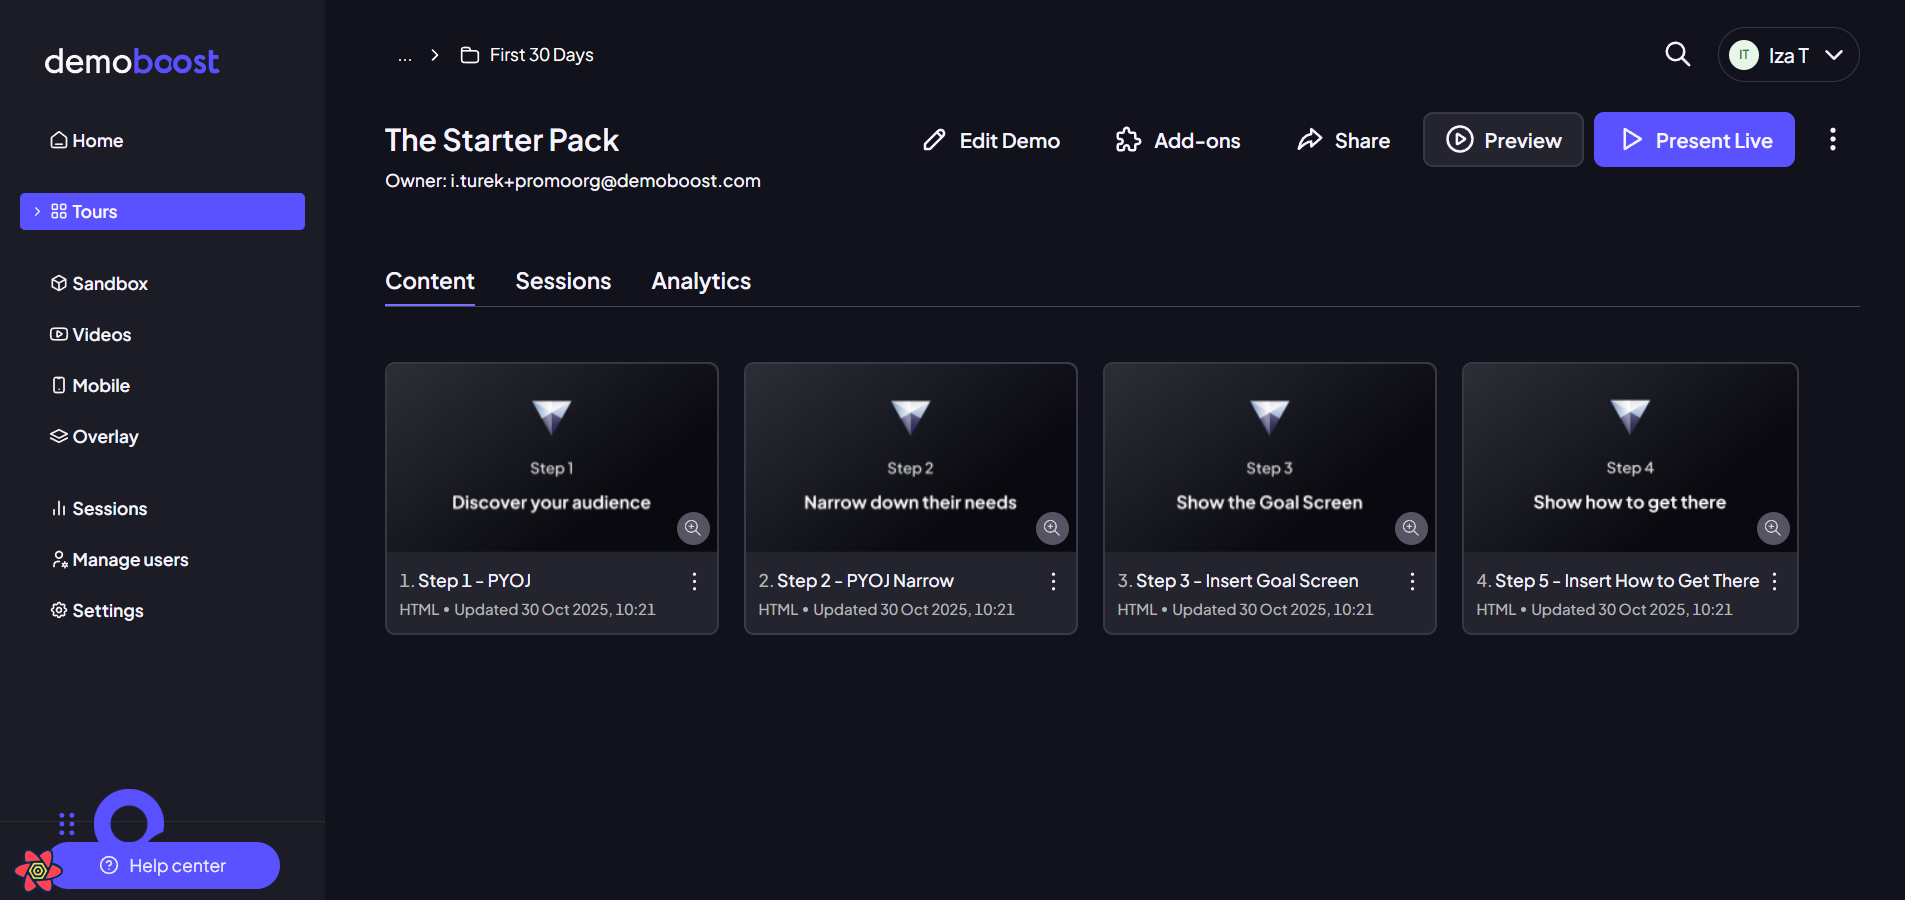
Step 5:
Once the installation is complete, navigate to the first screen, which is your Audience Discovery Screen. An introductory pop-up will appear. This pop-up provides an overview of the Great Demo methodology you are about to use. Within this introductory pop-up, you'll see an "Open Great Demo Playbook" button. It is highly recommended to click this button to access detailed documentation and familiarize yourself with the methodology's principles before you begin building.

Step 6:
When you feel ready to proceed with the technical setup and customization, click the "Start editing" button on the introductory pop-up.
Step 7:
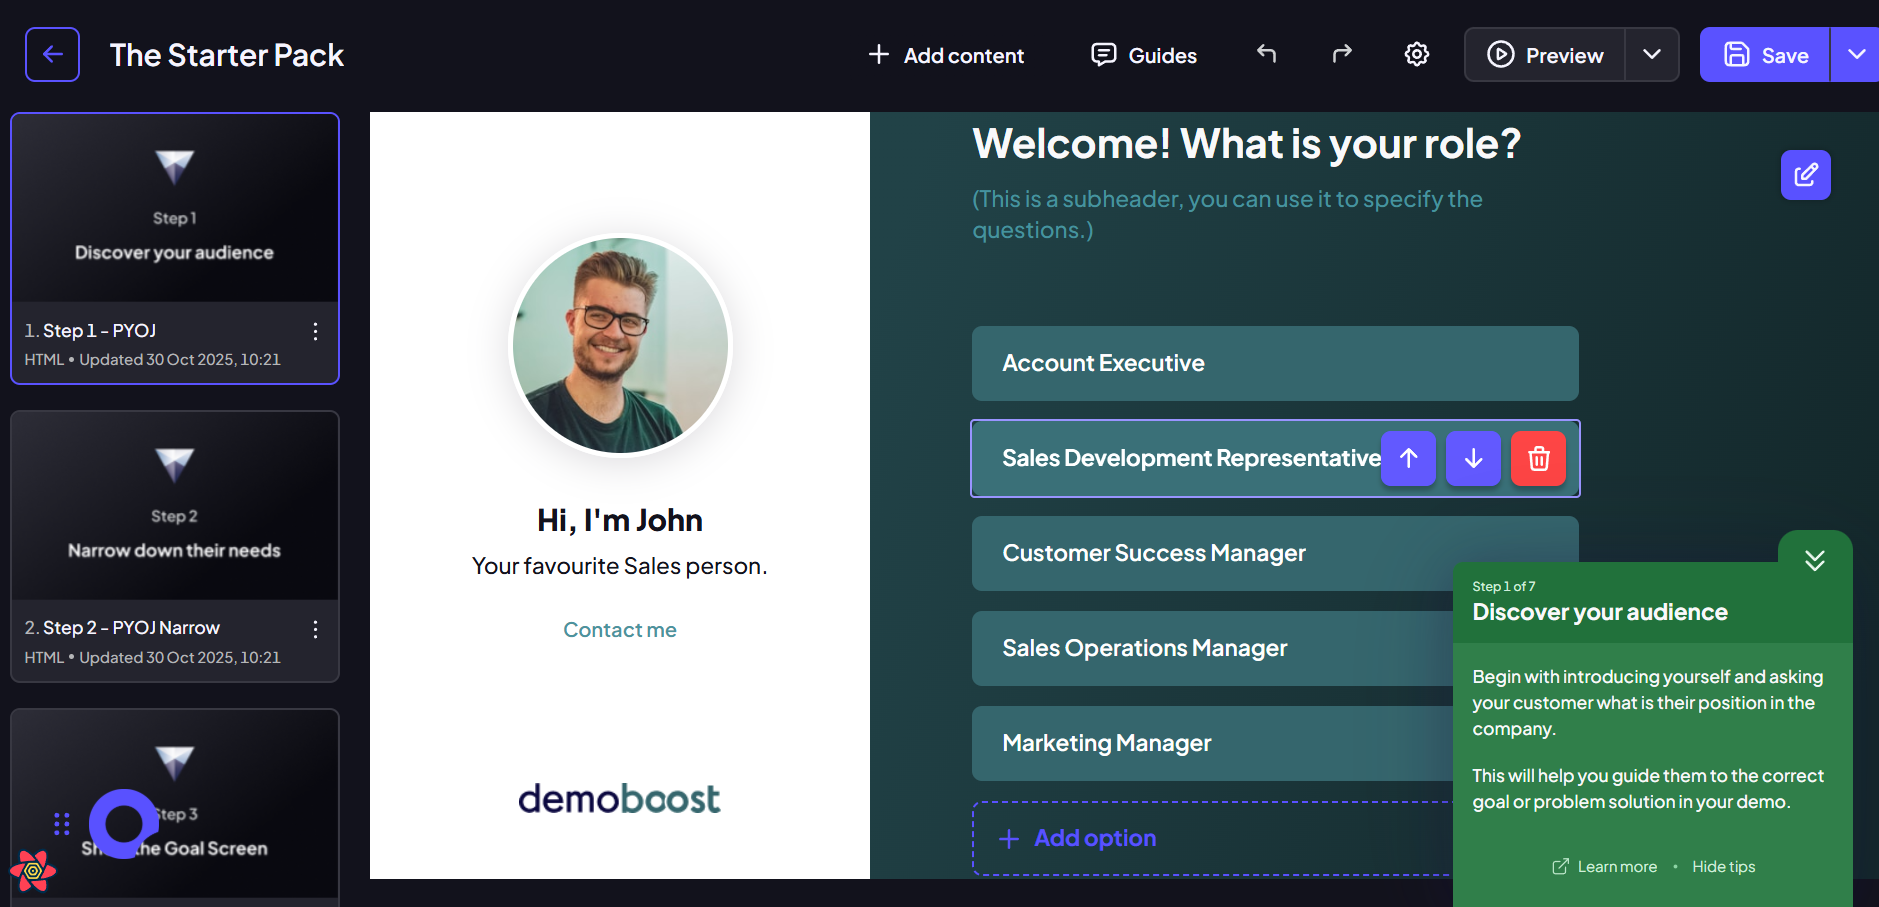
For every subsequent step of the demo creation process, you will find a contextual guide in the bottom-right corner of your screen. This guide explains the step you are currently on and provides instructions for what to do next, ensuring you adhere to the methodology.
Step 8:
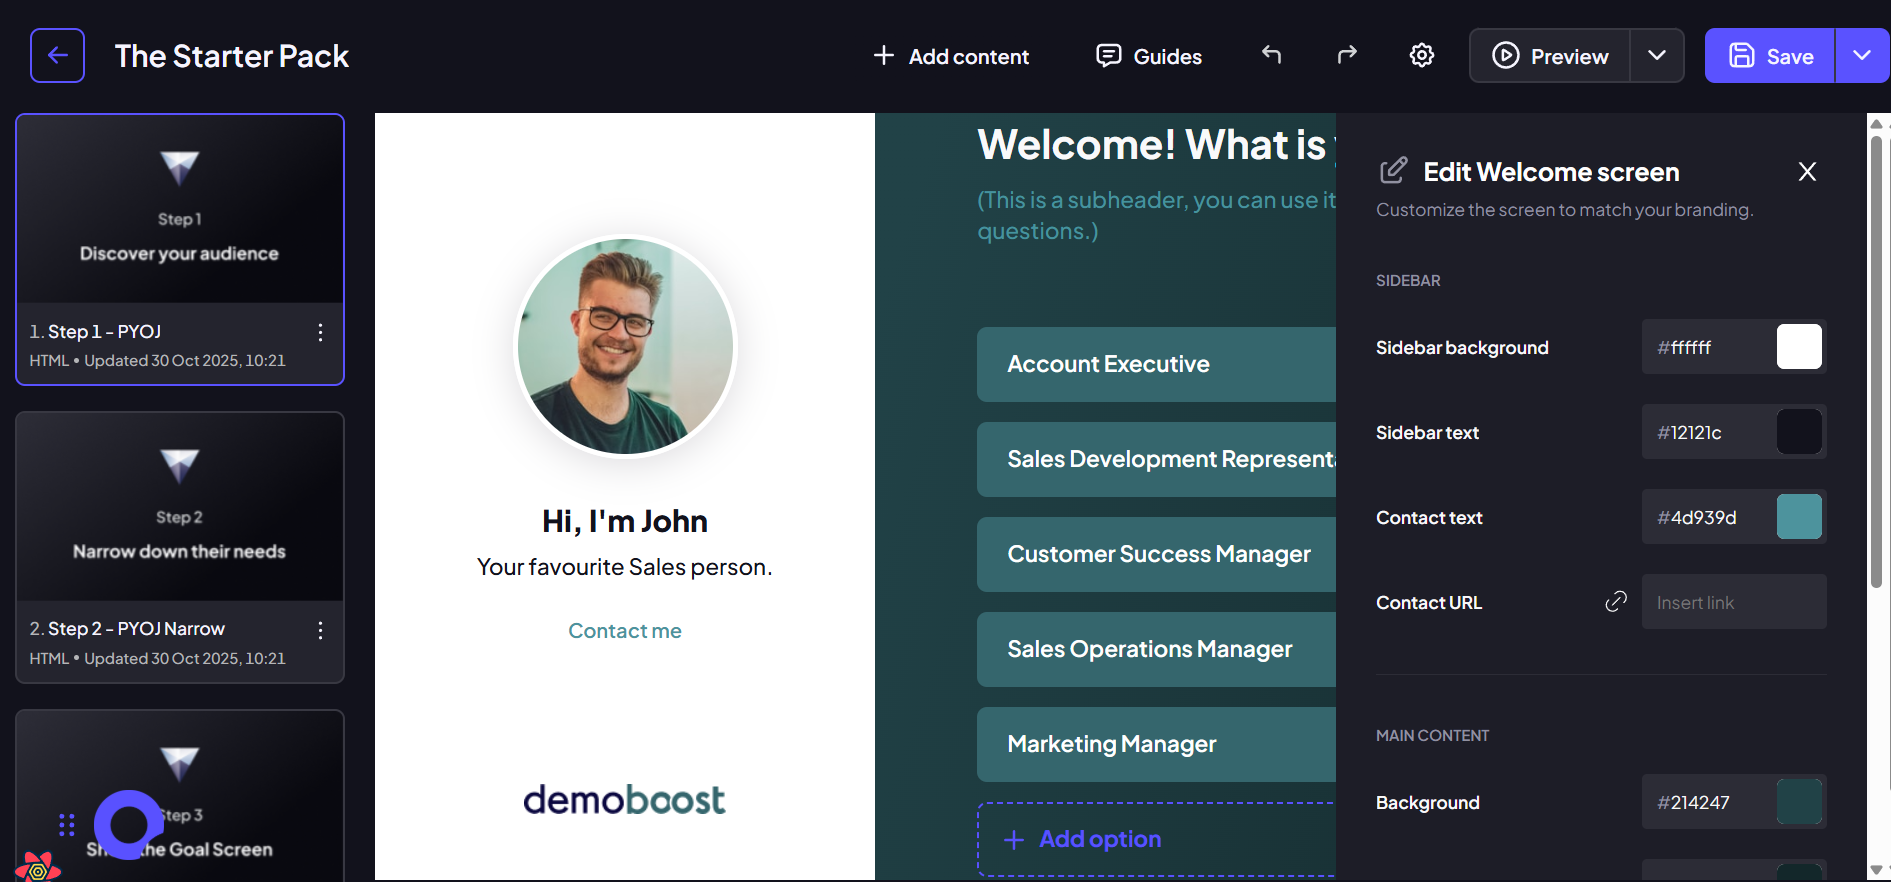
You can now customize the screen's text and image, which guides your customer to the correct solution. To edit the available roles or options, click on the text boxes to change their label.

Step 9:
Below the list of roles, you will see an "Add option" button. Use this to add new choices for your audience. You can also use the small trashcan icon next to an option to remove it.
Step 10:
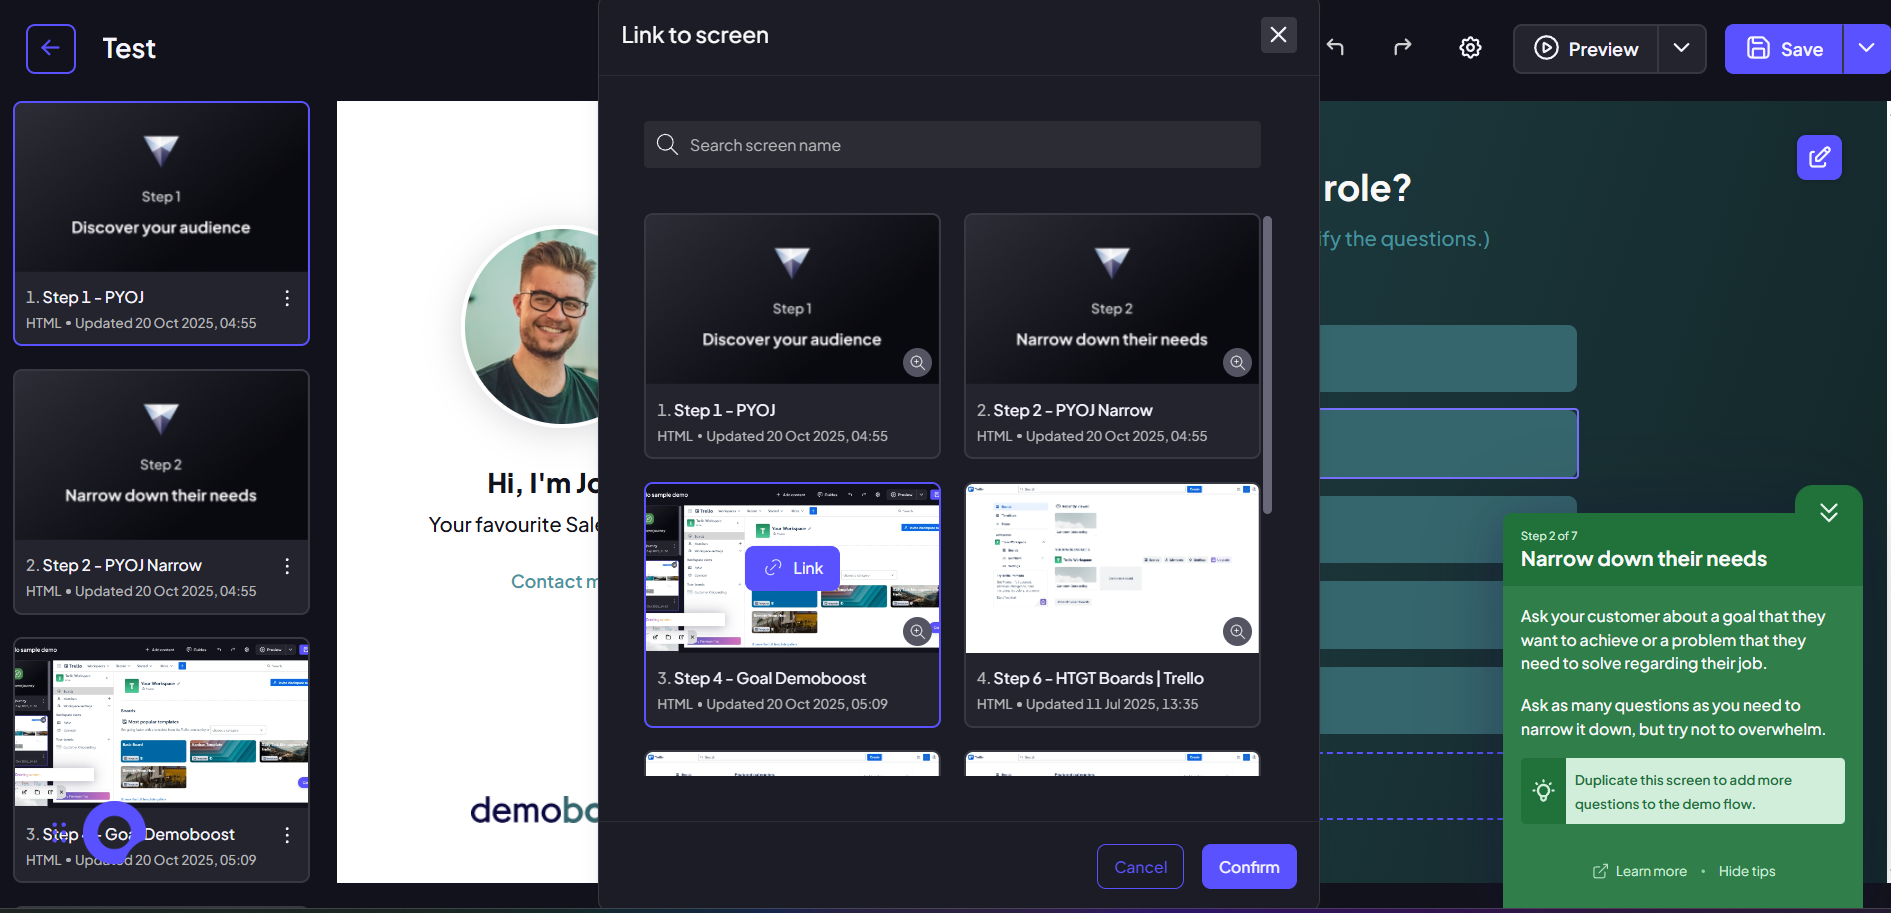
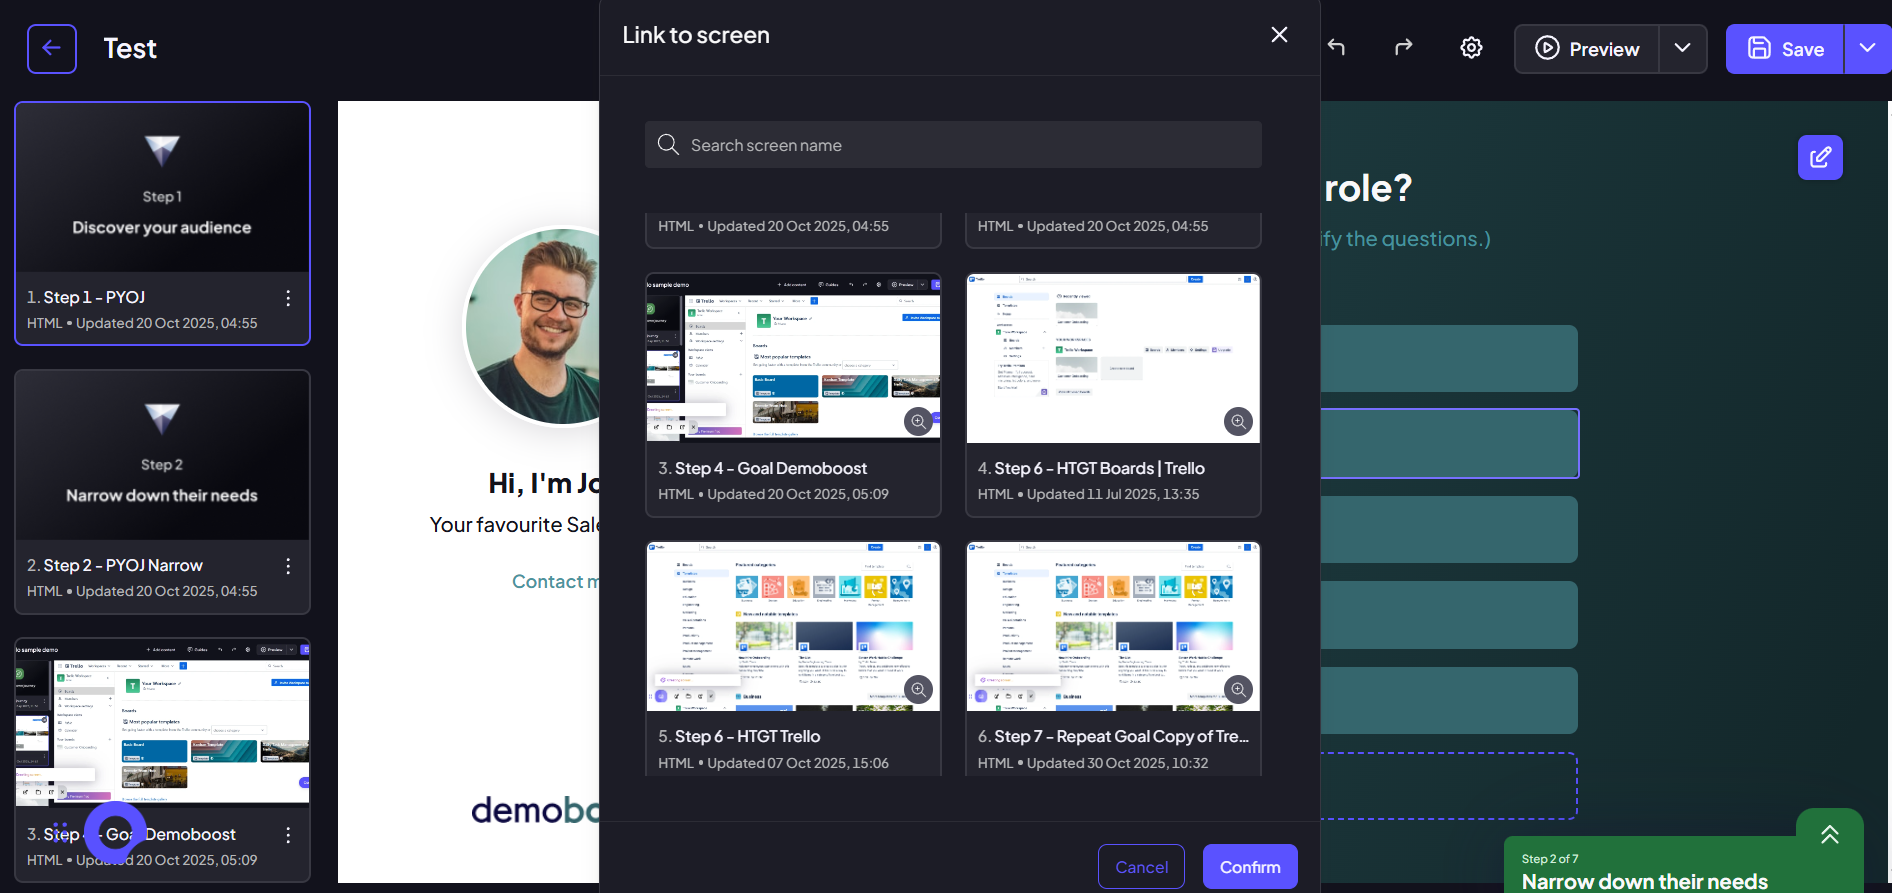
To make the screen interactive, select an option's text box and then click the "Link" button in the floating menu. This allows you to connect the option to a specific screen further down your demo flow.
Step 11:
In the top-right corner of the editor, look for the pencil icon and click it. This opens the customization menu for the screen's visual elements. Within the customization menu, you can customize the color scheme of the entire screen, including the sidebar and main content backgrounds. Use the color selectors to set your desired branding colors.
Step 12:
In the same customization menu, locate the Contact URL field. Here, you can add an external link, such as a contact form or sales person's calendar, for the contact link present on the screen.

Step 13:
Once you've customized the first screen to your liking, click on the second screen in the navigation panel on the left to move to the Customer Needs Screen.
Step 14:
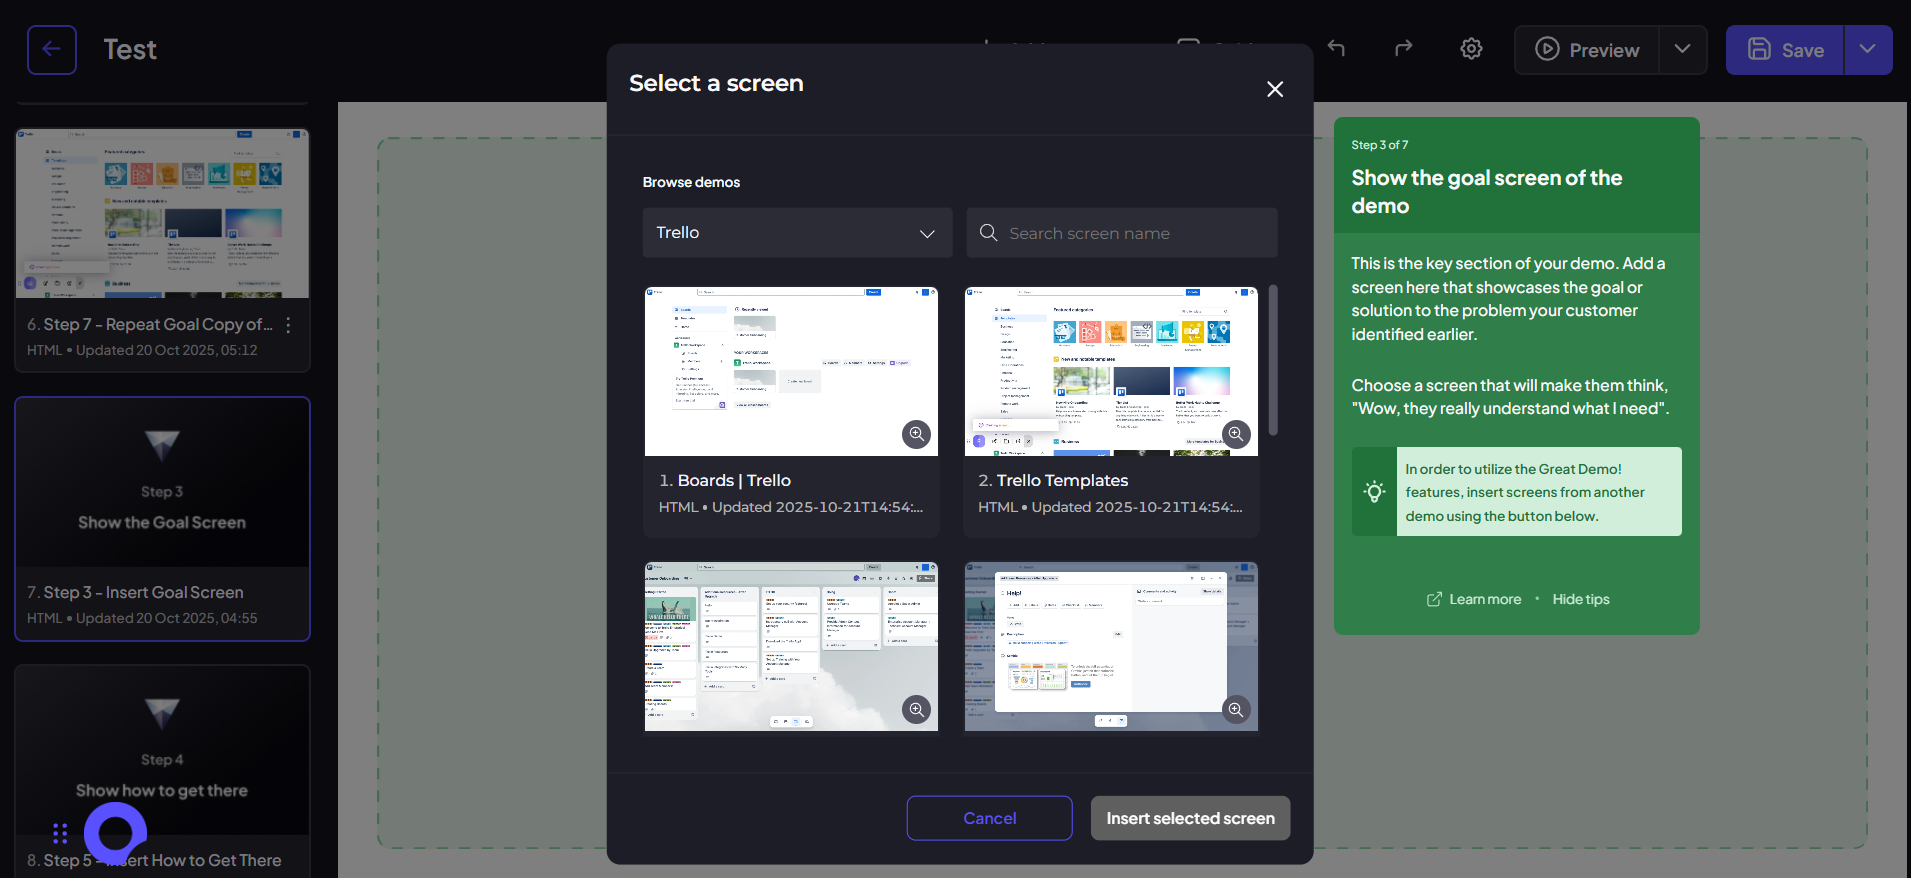
In Step 3 of the guided process, you are prompted to add your solution screen. Click on the "Insert screen from another demo" button within the green guide box. In the screen picker modal, first select the demo that contains your core product screens from the dropdown menu. Browse the available screens and select the key, most impactful screen that showcases the solution to the customer's identified problem. With the screen highlighted, click the "Insert selected screen" button at the bottom of the modal to add it into your Great Demo flow.
Step 15:
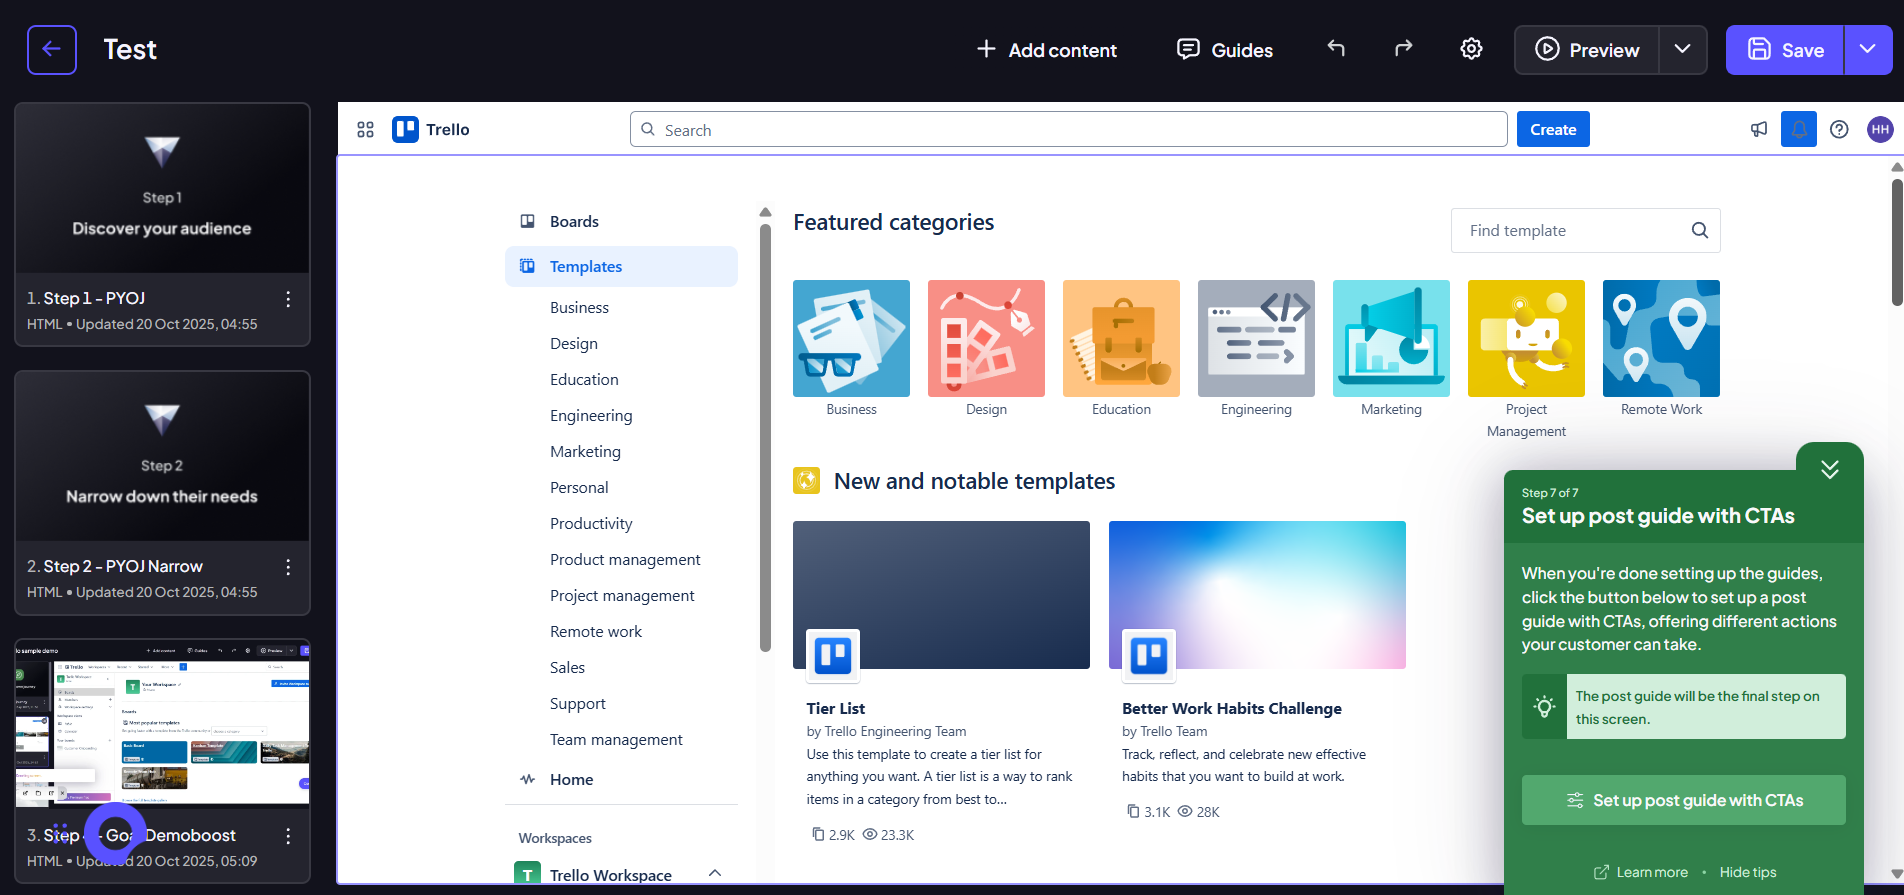
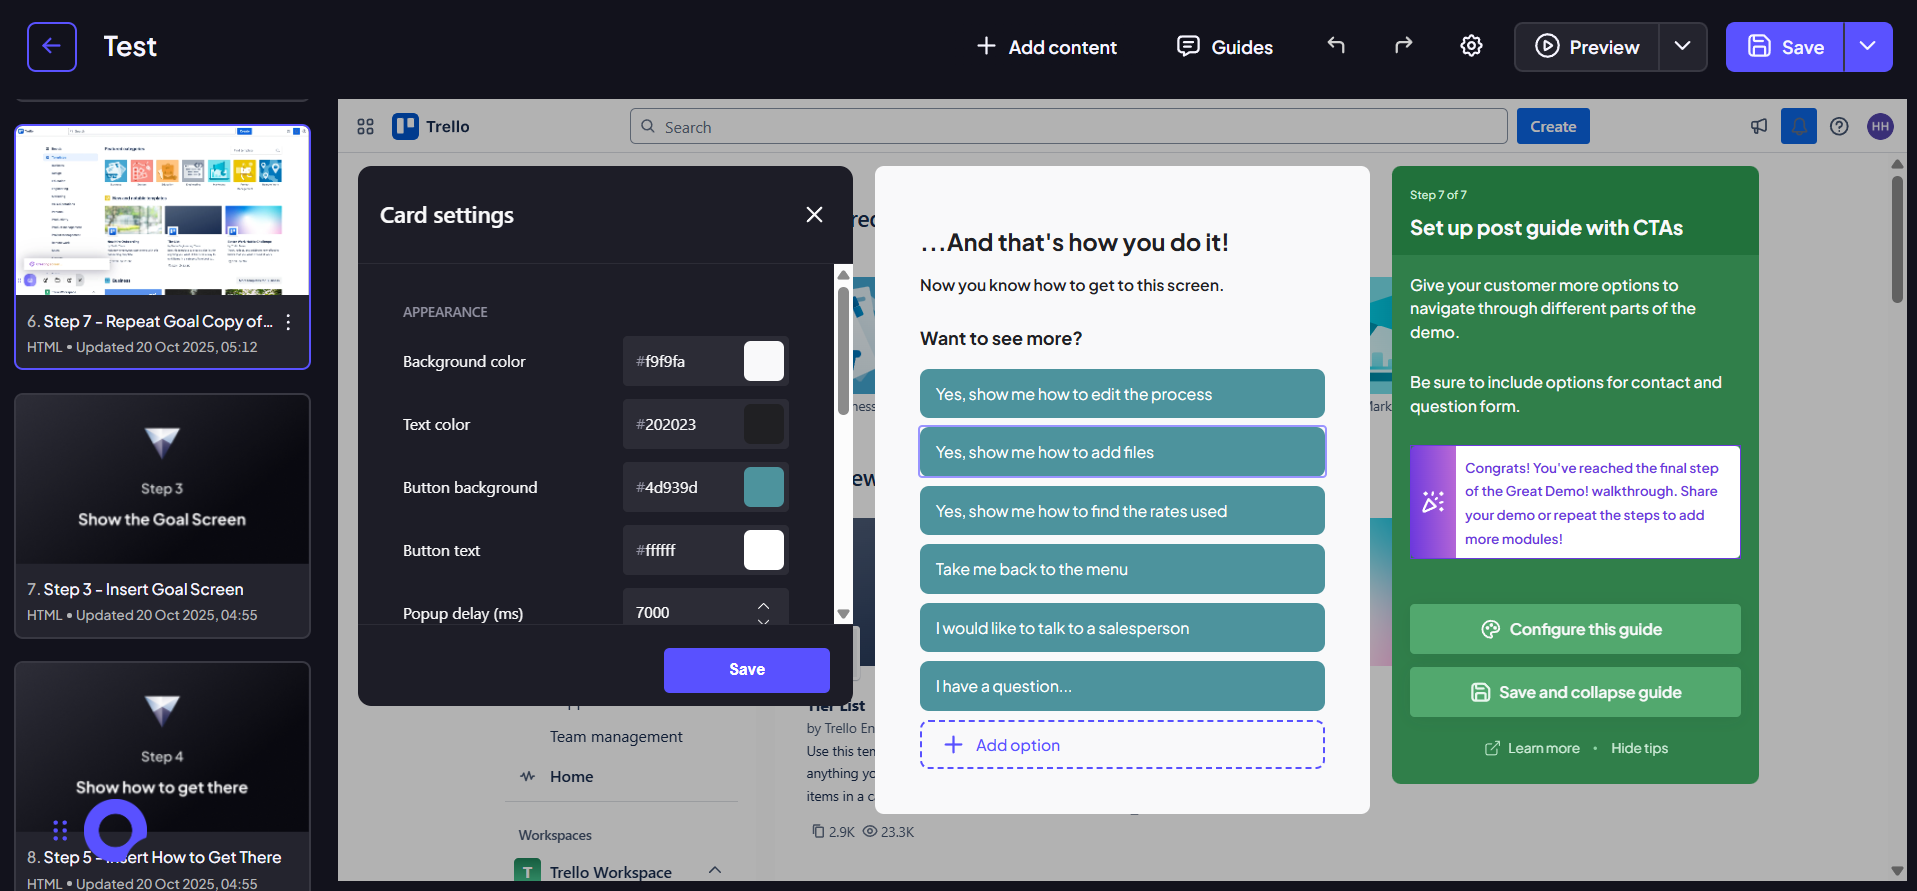
On this newly inserted Goal Screen, look for the instructional guide in the bottom-right corner and click the "Set up post guide with CTAs" button. This opens the configuration for the special end-of-screen pop-up.
Step 16:
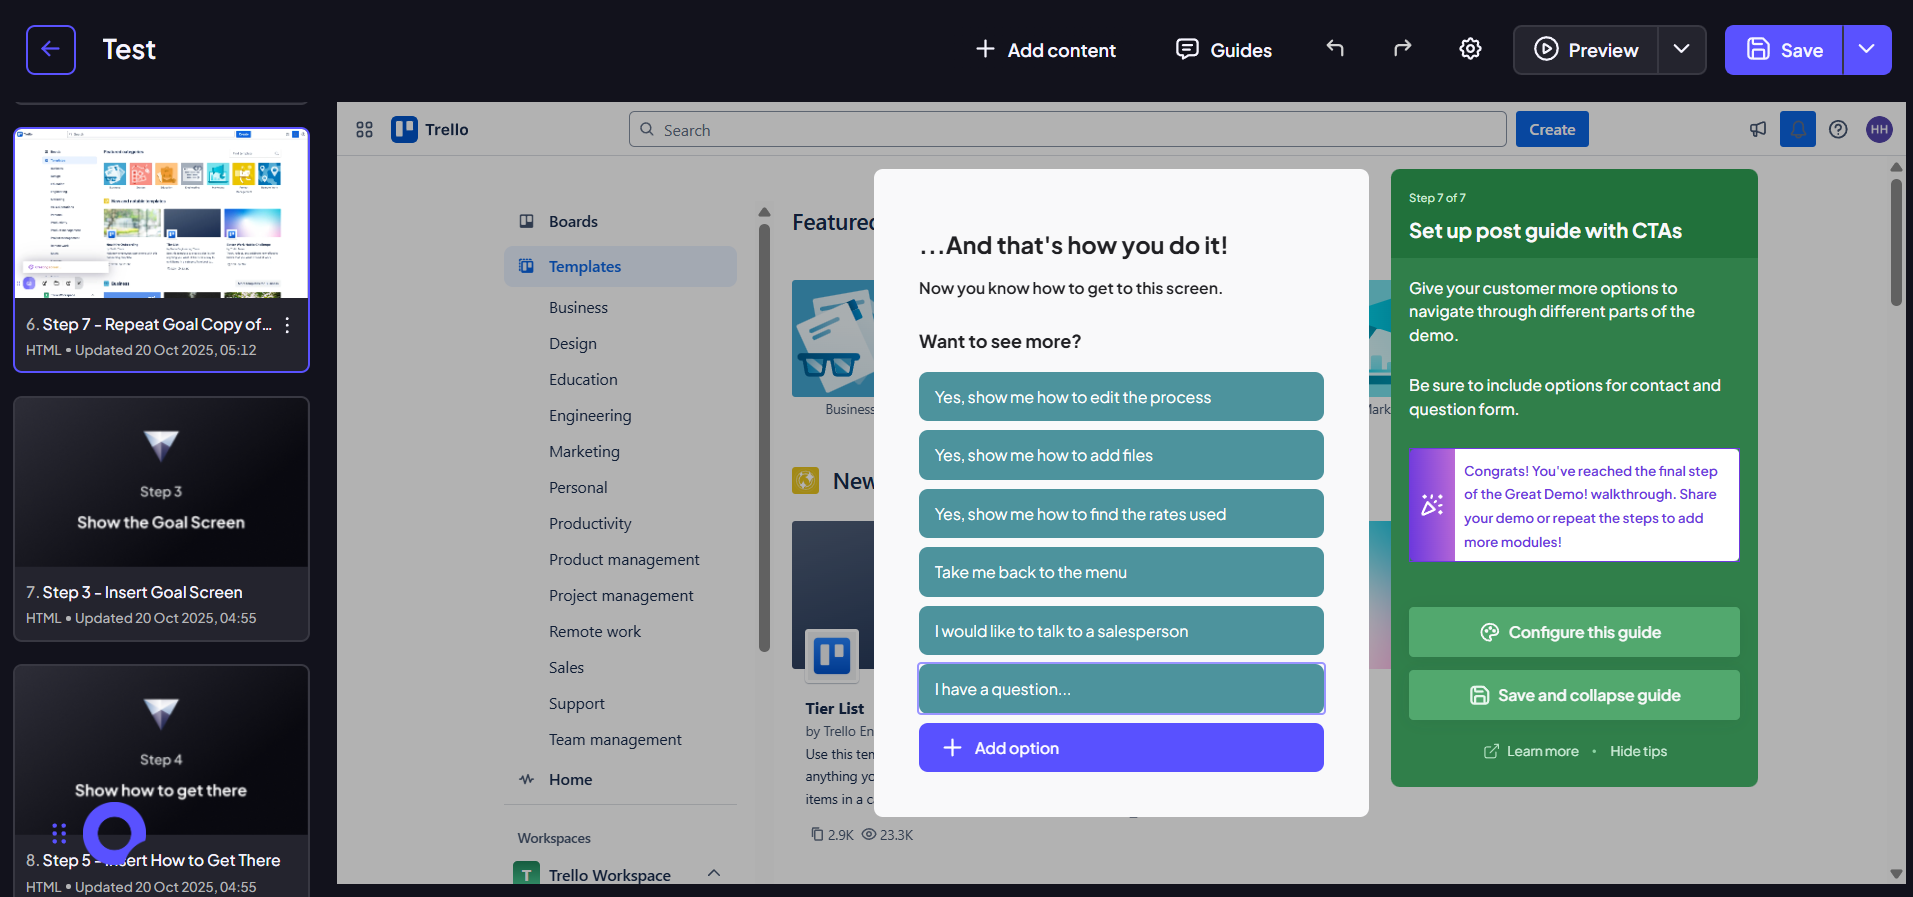
Within the configuration, use the "Add option" button to create new navigation choices for the viewer. Customize the text for each option.
Step 17:
Click the "Configure this guide" button to open the full settings. Here you can change the pop-up's appearance and link each button to an external URL or another screen in your demo flow.
Step 18:
After making your customizations, click the "Save and collapse guide" button to finalize the interactive pop-up.
Step 19:
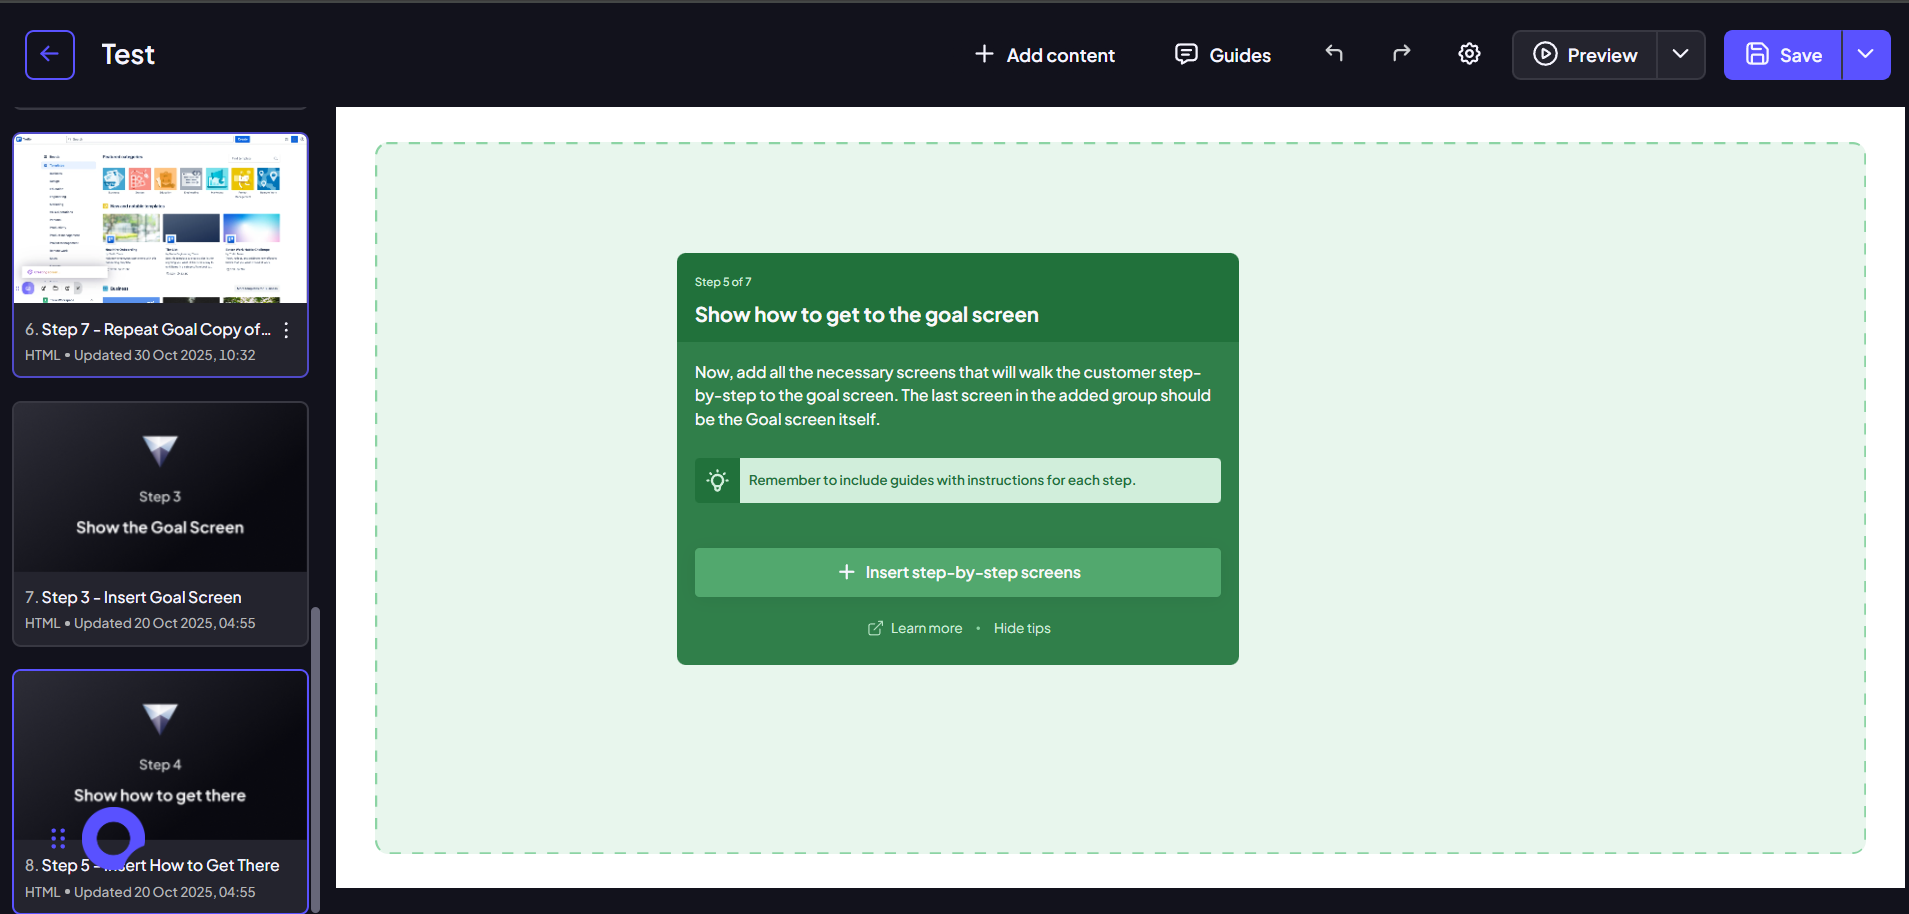
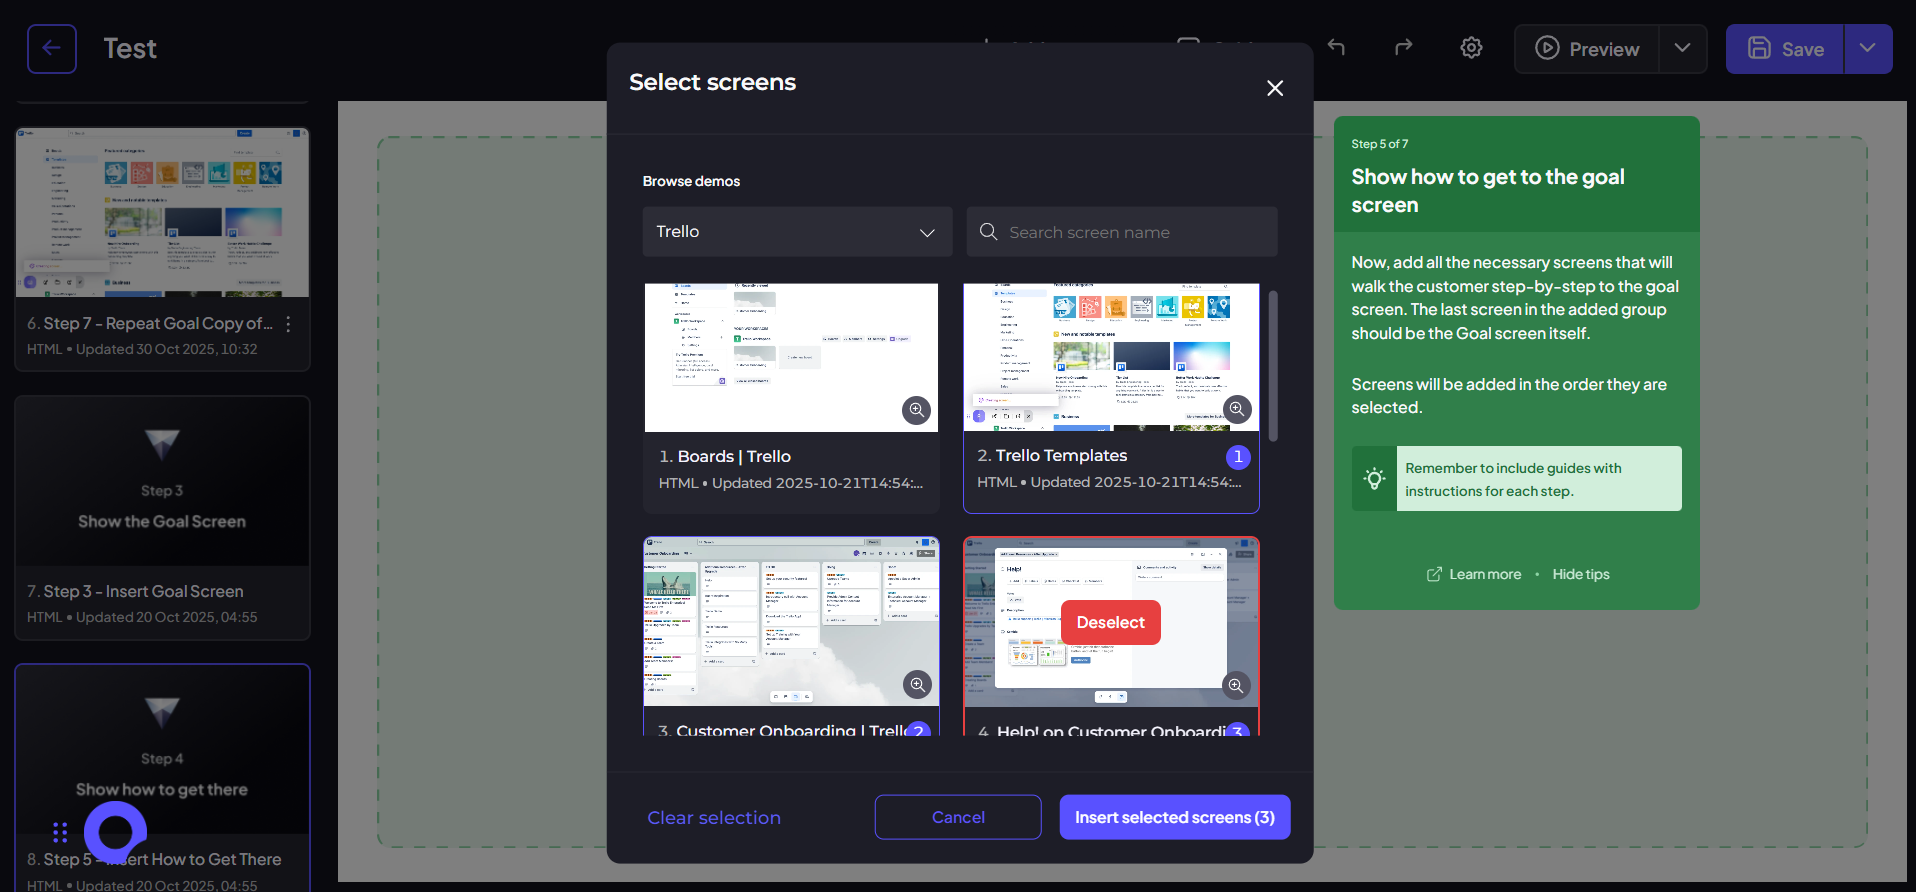
To show the process of reaching the goal, click the "Insert step-by-step screens" button in the instructional guide. Select a logical sequence of screens from your library that show the step-by-step process. Crucially, ensure the last screen you select is the Goal Screen you just used, as this creates a looping structure.
Step 20:
Click "Insert selected screens". The new screens will be added to your demo, ready for you to add any necessary guides or links to them.
Step 21:
Return to your initial Audience Discovery Screen and Customer Needs Screen. Ensure you finalize the links so that each button or option correctly directs the customer to the first corresponding screen of the flow you just built.
Note: Remember, the template screens used for adding content are designed to remain in your demo and can be reused. For future use, you can copy any screen from this template, including the multi-option CTA pop-up, and paste it into any other demo you are building. This allows you to use the template's advanced features in any of your projects.
You've successfully utilized the Great Demo Template Add-On! By following this clear, methodical approach, you ensure your demos are always focused on customer goals, contain logical solutions, and offer clear next steps, guaranteed to capture the attention of your prospects.