.png)
In today's fast-paced digital landscape, companies are constantly seeking innovative ways to captivate potential buyers and showcase their products or services. One effective approach that has gained traction is the concept of scripted, interactive product tours. These tours are becoming an essential element in many companies' sales processes, leveraging technology to engage prospects and present a unique perspective on specific problems. They provide a valuable avenue for curious buyers to self-educate and explore the offerings at their own pace.
While interactive demos naturally lend themselves to on-demand use cases, they also hold potential for live sales presentations. Unlike on-demand use cases, live demos involve dynamic discussions where buyers freely raise questions and expect immediate answers. The linear nature of traditional interactive demos might prove too restrictive in this scenario, limiting the flow of conversation and leaving some questions unanswered. This is where the sandbox demo emerges as a game-changer.
The sandbox demo represents a non-linear version of the interactive demo, granting presenters the freedom to explore various aspects of the solution. It enables them to address questions and concerns that may lie beyond the confines of a predefined script or standard flow. By setting up the interactive demo as a non-linear experience, presenters can adapt on the fly, catering to the unique needs of each prospect. This approach can offer a level of flexibility and customization for a more engaging live demo experience.
The sandbox demo can also be useful for technical architects and inquisitive users who have seen previous demos and wanted to get to grips with the solution in their own time. This could help them prepare and have questions lined up for their next demo or meeting with the vendor.
In this article, I’ll delve into the world of non-linear interactive demos and unveil the value they bring to both live sales presentations and for the technical & inquisitive users to explore in their own time. We will explore how sandbox demos empower presenters to tackle unanticipated questions, delve into specific features, and showcase the solution's versatility. Through real-world examples and practical insights, we will shed light on how companies can leverage this approach to create a more interactive, tailored, and persuasive sales experience.
Let's dive in and see how this can transform the way you engage with prospects, leaving a lasting impression and potentially increasing conversion rates.
Here are a few possible options for creating sandbox demos:
1. Sandbox area for certain areas of the solution based on user group/persona (e.g., admin vs end users such as data analyst or data owners)
Allowing the user to explore the most appropriate areas without a pre-determined path. This allows users to get to grips with their area in the solution by exploring many features and use cases in more detail.
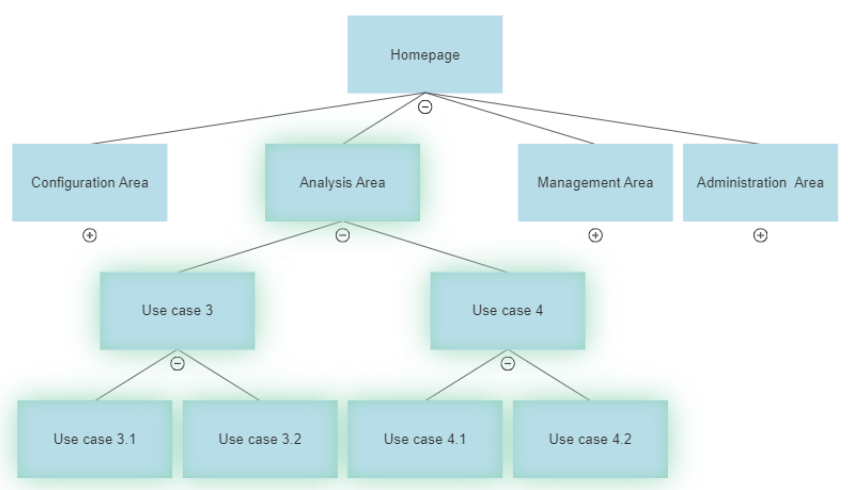
2. Sandbox area for all (or multiple) areas of the solution
Handing over the keys to the user to explore many areas without a pre-determined path. This is for the more inquisitive and/or technical users to see how the solution looks and feels throughout allowing them to explore in their own time.

In the example below, we allow the user to navigate from the homepage to all (or multiple) areas in the solution. They can then drill down to any of the available use cases they wanted within any ‘open’ area of the solution.
There is a clear start but there is no clear finish for the end user as they have the option to see multiple use cases within any area of the solution.
This approach may be useful to allow prospects who are technical architects or those who are the most inquisitive and really want to explore the solution in depth especially if it is a complex solution with many use cases.
When could it be used?
This is great for users who learn by doing. For users who have seen previous demos and wanted to get to grips with the solution in their own time. This could help them prepare and come armed with questions for their next demo/meeting with the vendor.
.jpeg)
Steps to Create a Sandbox Demo
The solution being used in this example along with Demoboost is ‘Voltage Fusion’ – A cloud Data Security Platform to discover, classify, protect, and govern data to reduce privacy risk.
The sandbox demo can link several linear demos together like adding a branch to a tree.
Step 1: Create a Notification on the Home Page
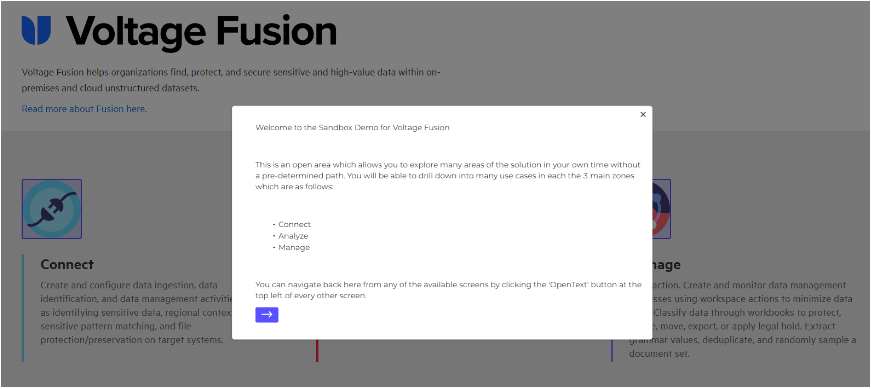
Make it clear this is a sandbox demo, an open area that allows the user to explore many areas of the solution in their own time without a pre-determined path. They will be able to drill down into many use cases in each main area of your solution (if they choose to).
Create a post guide
Select an element on the home screen > guide > post > enter your message you’d like your viewers to see.
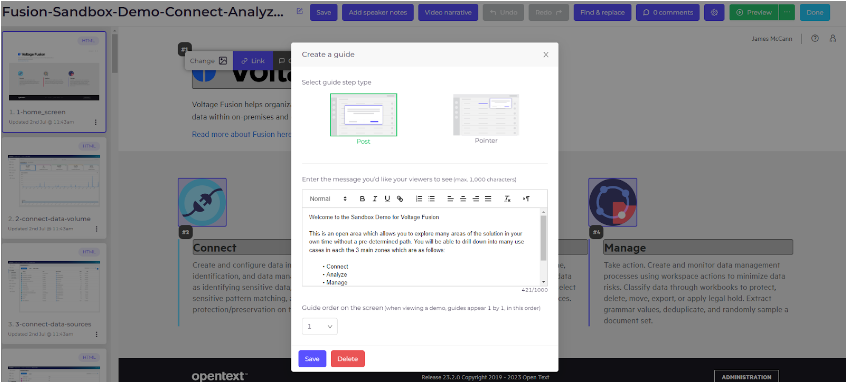
Which looks like this:
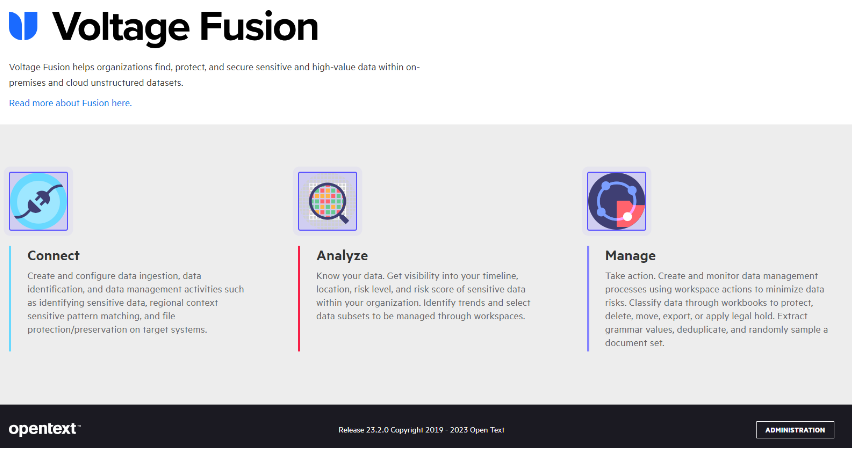
Step 2: Identify your branches
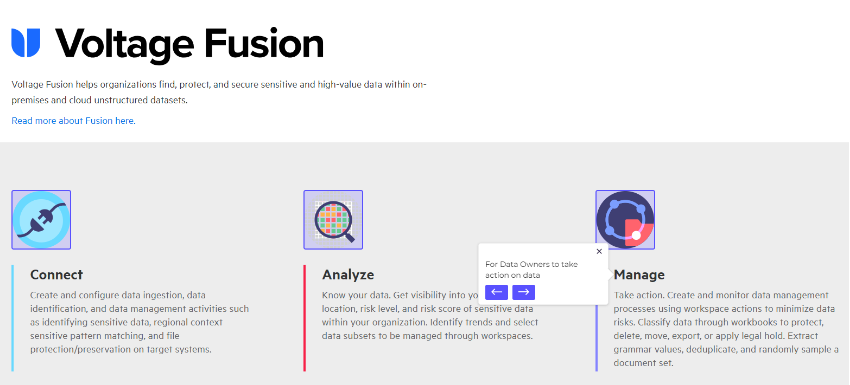
In this example, the branches will be the 3 main zones in the solution.
- Connect
- Analyze
- Manage
Each branch will allow the user to explore different features and use cases.
Step 3: Make it Clear (if Needed) What Each Branch Can do by Adding Pointers
Step 4: Ensure the User Can Return to the Home Screen at Any Time.
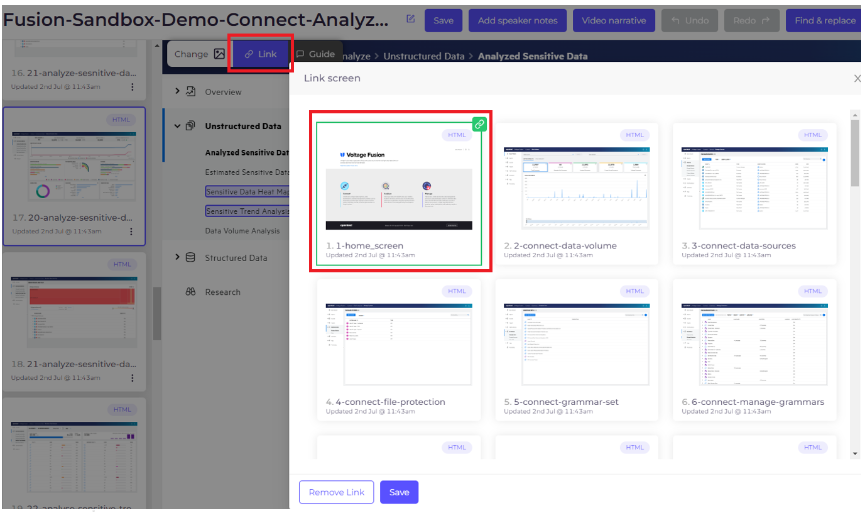
This ensures that the user can easily navigate to any of the other open areas when needed. In this example, I have selected the analyze section and created a link on the ‘opentext’ button at the top right of the screen.
To link the home button:
select home button > Link > select screen 1 (home screen)
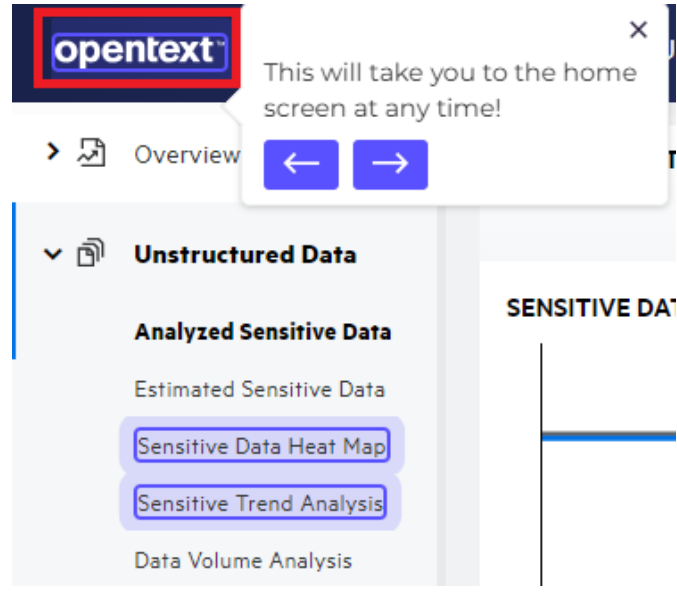
Ensure the User Knows They Can Return to the Home Screen at Any Time
Add a pointer guide:
Select home button > Guide > Pointer > enter your message you’d like your viewers to see.
Step 5: Add a Video Narrative
Add video narrative to highlight the value of your dashboards (or the first screen the user will see in each branch/zone) plus the several options available to explore:

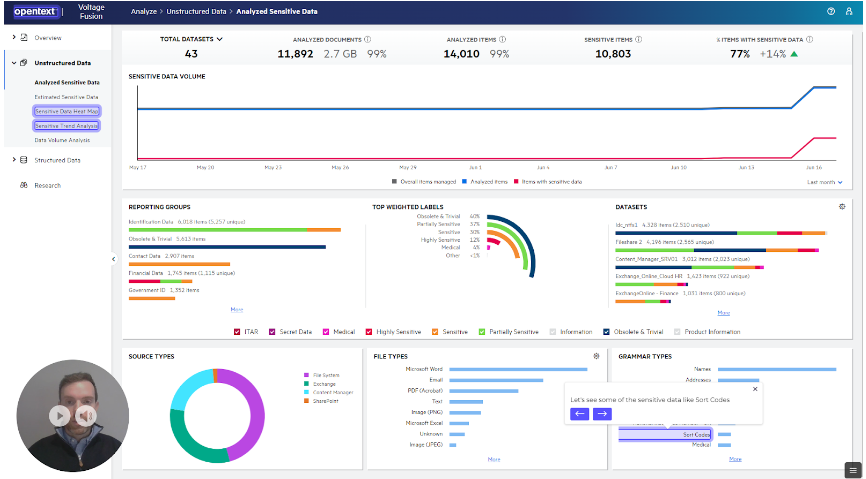
If the user decides to drill down, they should also have an opportunity to get back to either the home screen or back to the level they were previously on which had multiple options.
Step 6: Ensure Menus Aren’t Collapsed
If you have a collapsible menu, ensure that it isn’t collapsed.
In this example, 3 main dashboards have been made available to the user within the ‘analyze’ branch. Importantly, these dashboards will be accessible from any available screen within the analyze zone.
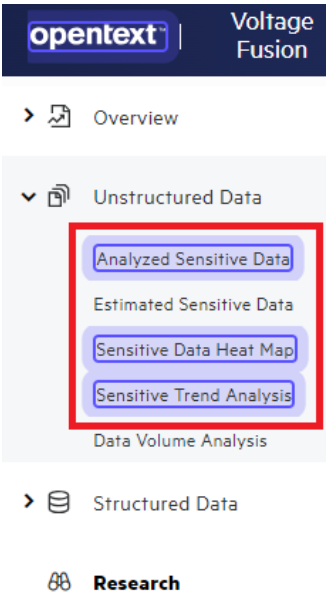
In this case below, I’ve drilled down further by selecting the option to preview documents that included sort codes. Again, the user can always navigate to any of the other available dashboards in this branch, drill down further or even go back to the home page.
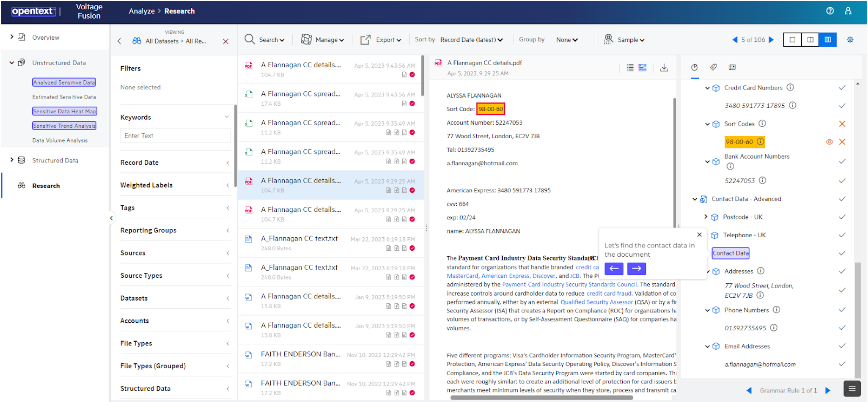
If you decide to drill down further, you then have opened another series of screens which the user can navigate through. This same process can be repeated for each area you decide to open.
Step 7: Duplicate screens from previous demos
Don’t recreate the wheel. Duplicate screens from previous demos where you can:
Whether that is a collection of screens:
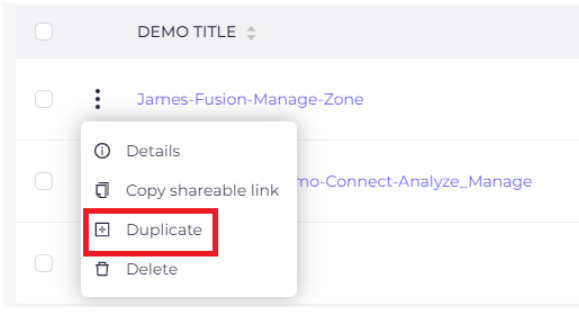
Or selected screens:
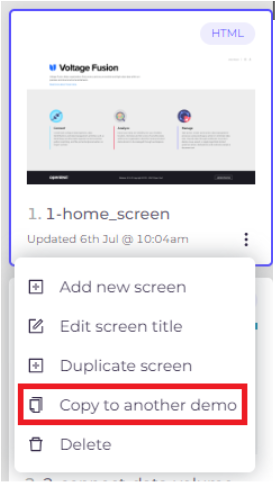
Step 8: Preview Your Demo
This is the most important step. Run through the demo and ensure that you don’t run into a dead-end. If you find a screen that doesn’t allow you to navigate elsewhere, you know you must add the correct links AND / OR create some new screens to give the user options.

Wrapping it up!
Sandbox demos offer a dynamic and interactive approach to demo automation, allowing users to explore solutions freely and cater to different learning styles. While not a replacement for linear demos, sandbox demos serve as a valuable addition to demo strategies, particularly for inquisitive prospects and hands-on learners. They empower users to delve deep into features and use cases, helping them prepare and come armed with questions for future demos or meetings with vendors.

%20(1).png)
.png)
.png)
